
Jeep Cherokee
Map Light Bulbs Replacement Guide
How to change a burnt out map light bulb
in the overhead console of a 5th generation 2014-2018 Jeep Cherokee.

By Paul B. Michaels Author & Photographer Auto Mechanic Since 1989 |
||
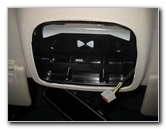
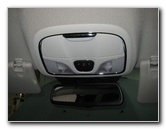 2015 Cherokee Map Lights |
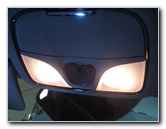
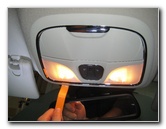 Pry Out Front Edge Housing |
|
| This
automotive maintenance tutorial was specifically written to assist
owners of the fifth generation (2014, 2015, 2016, 2017 and probably
also the refreshed 2018 model year) Jeep Cherokee in changing a
burnt out map light bulb in the overhead console or upgrading both
bulbs to LED units. Owners of other Jeep, Dodge, Chrysler, Fiat and RAM vehicles such as the Compass, Renegade, Wrangler, Grand Cherokee, Patriot, 500, Town & Country, 200, 300, Pacifica, Challenger, Charger, Dart, Durango, Journey, Grand Caravan, RAM 1500, C/V Tradesman and ProMaster Van may also find these DIY instructions to be helpful. The compatible replacement light bulb part number is 2825 (A.K.A. W5W). You can also use brighter 2825 LED bulbs. The tools needed to access and replace the light bulbs include a plastic pry bar tool and a small flathead screwdriver. |
||
|
|
||
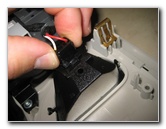
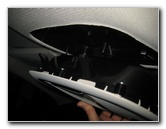
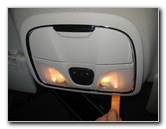 Pry Out Other Side |
 Overhead Housing Removed |
|
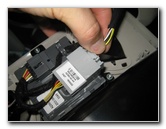
| To access the map
light bulbs, you'll need to remove the entire overhead console. There are two metal clips holding the front edge (near the windshield) of the overhead console in place. Use a plastic pry bar tool to gently pry down the front edge of the overhead console. You may need to re-insert the tool and pry on both the left and right sides. Lower the front edge of the housing (closest to the windshield) and remove the two plastic hooks on the rear edge (closer to the back of the car). |
||
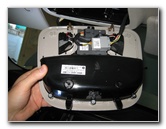
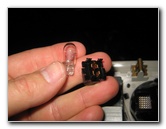
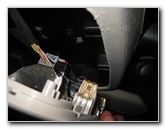
 Disconnect Power Plug |
 Light Bulb Socket & Wires |
|
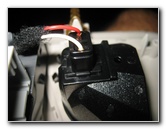
| Press in the
release tab on the electrical connector before sliding it straight out of
its socket. Locate the black plastic bulb socket with red and white wires coming out of it. |
||
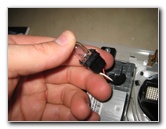
 Push In Release Tab |
 Remove Bulb Socket |
|
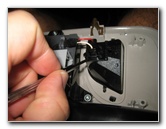
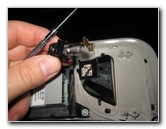
| Gently push in the
release tab on the bulb socket with your finger tip or a small flathead
screwdriver. Pull the bulb socket out of the housing. |
||
 Pull Out Old Light Bulb |
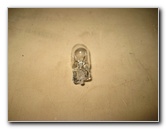 Old # 2825 (W5W) Bulb |
|
| Pull the old light bulb straight out of the socket. | ||
|
|
||
 Push In New 2825 Bulb |
 Replace Bulb Socket |
|
| Push a new number
2825 light bulb straight in to
the socket. You can also use any other miniature wedge base bulbs such as the # 158, 168, W5W, 194 or a compatible LED unit. Push the bulb socket back in to the housing until it clicks securely in to place. |
||
 Opening In Headliner |
 Push In Electrical Connector |
|
| Raise the overhead
console to the headliner. Push the grey plastic power plug straight in to its socket. |
||
 Line Up Black Plastic Hooks |
 Re-Insert Hooks Rear Edge |
|
| Line up the two black plastic hooks on the rear edge of the overhead console and re-insert them in to the opening in the headliner. | ||
 Metal Clips - Near Windshield |
 Tap In Friction Fasteners |
|
| Line up the two
metal clips on the front edge of the overhead console (near the windshield)
with their corresponding black plastic slots. Firmly push on the front edge of the housing to secure the two friction fasteners in place. |
||
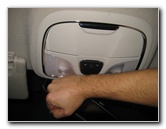
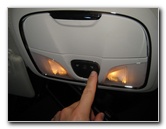 Press On/Off Buttons |
 Test New Map Light Bulbs |
|
| Make sure that the
overhead console is flush with the headliner at every edge. To test the new map light bulbs, press the "On/Off" buttons. For more,
check out all of my
Jeep Cherokee DIY Repair & Maintenance Guides. |
||
| If you found this guide to be helpful,
please consider making a small donation by clicking on the PayPal.com
"Donate" button located to the right of this paragraph. Thank you!
(Note: I am not a registered charity. Donations are not tax deductible.) |