
Jeep Renegade
Serpentine Belt Replacement Guide
How to change the serpentine accessory
belt on the Tigershark MultiAir II 2.4L I4 engine in a 2015 to 2018 Jeep
Renegade.

By Paul B. Michaels Author & Photographer Auto Mechanic Since 1989 |
||
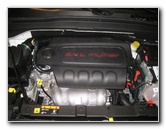 2016 Renegade 2.4L I4 Engine |
 Serpentine Accessory Belt |
 Turn Front Wheels |
| This
automotive maintenance tutorial was specifically written to assist
owners of the first generation (2015, 2016, 2017, 2018 and perhaps
also the 2019 & 2020 model years) Jeep Renegade SUV in changing
the serpentine accessory belt on the TigerShark MultiAir II
2.4 liter inline four cylinder engine. Owners of other Chrysler, Dodge, Jeep, RAM or Fiat vehicles such as the 200, 300, Pacifica, Town & Country, Avenger, Charger, Challenger, Journey, Dart, Durango, Magnum, Grand Caravan, Fiat 500 500X or 500L, Fiat 124 Spider, Grand Cherokee, Wrangler, Compass, Liberty, Patriot, ProMaster, 1500 and C/V Tradesman minivan may also find these DIY instructions to be helpful. A few compatible replacement belts with their part numbers are as follows: Bando 6PK2005, Gates K060790, ACDelco 6K790, Dayco 5060790 and Roadmax 6K790AP. The tools needed to complete this procedure include a flathead screwdriver, a Phillips head screwdriver, a 16mm socket and a 3/8" drive ratchet or a 16mm wrench. |
||
|
|
||
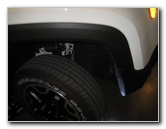
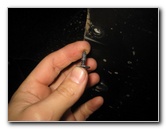
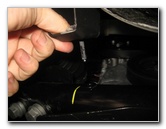
 Passenger Wheel Well Liner |
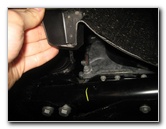 Pull Out Plastic Pop Rivet |
 Remove Counterclockwise |
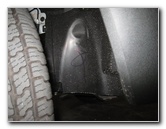
| The first few steps
are to park the SUV on a level surface, turn the steering wheel all the way
to the right and turn off the ignition. Turning the front wheels all the way to the right will help create more working room in the front passenger side wheel well to access the belt and pulleys. Next, open the hood and take a look at how the old OEM belt is routed around the various pulleys from the above the engine. Then move to the front passenger wheel well and locate the black plastic liner or "splash guard". Use a flathead screwdriver or a pop rivet removal tool to gently pry out the black plastic fastener at the bottom rear edge of the wheel well liner. I was able to just pull the plastic pop rivet out by hand. Remove the single screw at the front lower edge of the wheel well liner by turning it counterclockwise with the Phillips head screwdriver. |
||
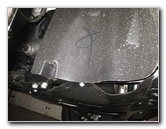
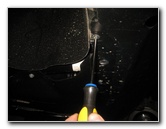
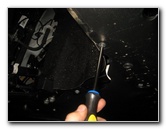
 Phillips Screw Removed |
 Pull Back Splash Guard |
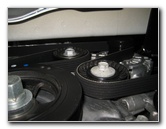
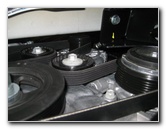
 Crankshaft Pulley - Bottom |
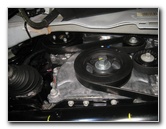
| Set the Phillips
head screw aside in a safe place. Gently pull back the plastic wheel well cover to access the old belt and the pulleys. Take a minute to study how the old belt is routed around the various pulleys including the crankshaft, coolant (water) pump, alternator, A/C compressor, idler and the tensioner. |
||
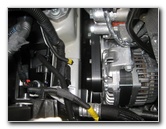
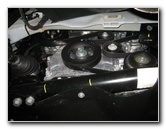
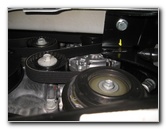
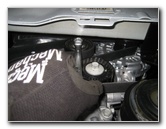
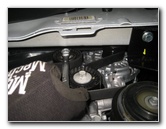
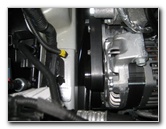
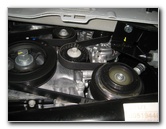 Idler Pulley & Tensioner - Top |
 Tensioner Pulley - Top |
 Water Pump Pulley |
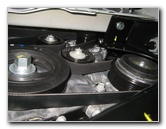
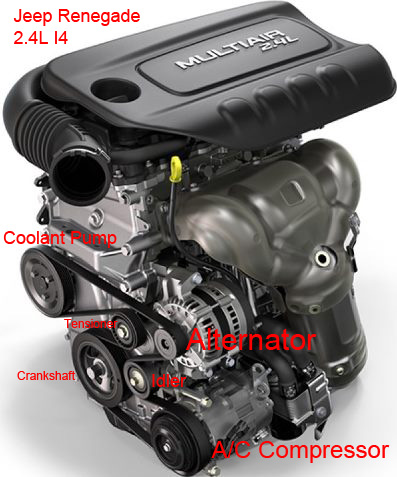
| The pulley for the
tensioner assembly is located near the top center part of the engine just
above the idler and the crankshaft pulleys. Here is a belt routing diagram for the Tigershark MultiAir II 2.4L I4 engine with the various pulleys labeled.
|
||
 A/C Compresor - Lower Front |
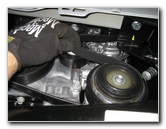
 16mm Bolt - Tensioner |
 Rotate Counterclockwise |
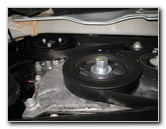
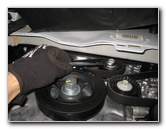
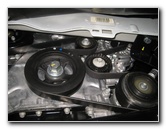
| Place a 16mm socket
and a 3/8" drive ratchet or a 16mm wrench over the bolt on the tensioner
pulley. Rotate the bottom of the 16mm wrench towards the front of the SUV to turn it counterclockwise. You'll see the tensioner assembly and pulley rotate back towards the rear of the SUV which will release the tension on the old belt. Hold the tensioner in the released position with one hand while slipping the old belt off the pulleys. |
||
|
|
||
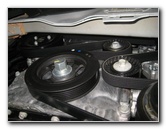
 Release Tension - Old Belt |
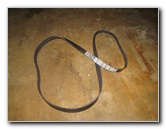 Old OEM Belt Removed |
 Route New Belt On Pulleys |
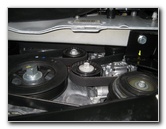
| Remove the old belt
from the passenger side of the engine bay. Inspect the old belt and look for any chunks of missing rubber, fraying or exposed metal cables. If the old belt is in decent condition, consider saving it in your cargo area or garage as an emergency backup just in case the new belt fails prematurely. I recommend buying the Bando 6PK2005 serpentine belt since it has excellent reviews on Amazon. Lower the new belt down in to the passenger side of the engine bay. Route the new belt around the various pulleys. Keep in mind that the ribbed side of the belt should be wrapped around the ribbed pulleys and the smooth side of the new belt should be against the smooth idler pulley. Refer to the belt routing diagram above for guidance. I started by wrapping the bottom of the belt around the crankshaft pulley, then forward to around the A/C compressor, up around the idler pulley, up to over the alternator pulley and then across to the coolant pump pulley. Then hold the final loop of the belt near the tensioner pulley. |
||
 Wrench On Tensioner Pulley |
 Rotate Counterclockwise |
 New Belt On Crankshaft |
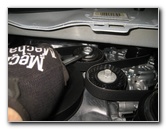
| Place the 16mm
wrench over the bolt head on the tensionser assembly pulley and rotate it
counterclockwise (move the wrench handle towards the front of the SUV). Hold the tensioner assembly rotated back towards the rear of the SUV with one hand and use the other hand to carefully slip the last loop of the new belt over the tensioner pulley. |
||
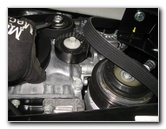
 Check Belt Routing |
 Ribbed On Ribbed Pulleys |
 New Belt Installed |
| Double check that
the new belt is routed properly around the pulleys. Check the tension on the new belt by twisting the longest length between the alternator and coolant pump. If the new belt can be twisted more than 90 degrees (perpendicular) to itself, the new belt may be too loose and the tensioner assembly may need to be replaced. |
||
 Smooth Side - Idler Pulley |
 View From Above Engine |
 Push In Plastic Pop Rivet |
| Once you are
certain that the new belt has been routed properly and sits evenly on the
pulleys, you can lower the plastic wheel well liner back into place. Push the plastic pop rivet back in to the hole on the metal frame to secure the splash guard in place. |
||
 Spin In Phillips Head Screw |
 Tighten Screw Clockwise |
 Wheel Well Liner Replaced |
| Spin in the
Phillips head screw and tighten it in the clockwise direction until it is
snug. Double check that the two wheel well liners fasteners are secure. Start the engine and listen closely for any strange sounds that might indicate a problem such as a seized or loose pulley or an improperly routed belt. Be sure to record the belt change in your SUV's service records. For more,
please check out all of my
Jeep Renegade DIY Repair
& Maintenance Guides. |
||
| If you found this guide to be helpful,
please consider making a small donation by clicking on the PayPal.com
"Donate" button located to the right of this paragraph. Thank you!
(Note: I am not a registered charity. Donations are not tax deductible.) |