
Kia
Rio Engine Air Filter Replacement Guide
How to clean or change the engine air filter
element in a 3rd generation 2012-2016 Kia Rio with the part numbers.

By Paul B. Michaels Author & Photographer Auto Mechanic Since 1989 |
||
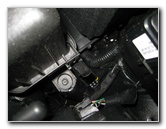
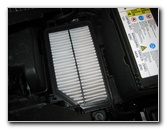
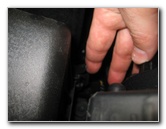
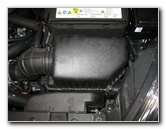
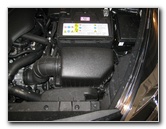 2014 Rio Engine Air Box |
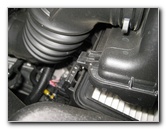
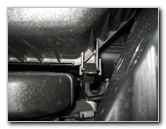 Metal Latch |
 Release First Metal Latch |
| This
automotive maintenance tutorial was specifically written to assist
owners of the third generation (2012, 2013, 2014, 2015 and also the
updated 2016 model year) Kia Rio sedan in cleaning or changing the
engine air filter element in the Hyundai Gamma 1.6 liter inline four
cylinder motor. Owners of other Kia and Hyundai vehicles such as the Optima, Forte, Cadenza, K900, Sorento, Sportage, Sedona, Soul, Elantra, Veloster, Sonata, Azera, Tucson, Santa Fe, Genesis and Equus may also find these DIY instructions to be helpful. A few compatible replacement engine air filters with their part numbers include the following: K&N 33-2472, Wix 49022, Hastings AF1502, Kia 28113-1R100, Fram CA11206, Premium Guard PC4684, Pentius PAB11206, Beck Arnley 042-1844, Mahle LX3300, Ecogard XA6200 and Luber-finer AF5206. No tools are required to replace the engine air filter. |
||
|
|
||
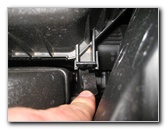
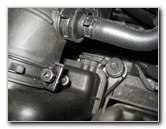
 Flip Down Second Latch |
 2nd Metal Latch Released |
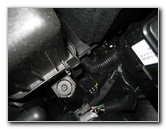
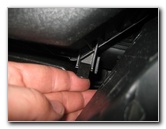
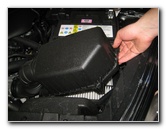 Lift Off Top Half Air Box |
| The engine air box
is located at the front right (driver) side of the engine bay just in front
of the 12V automotive battery. Flip down the two metal latches on the right side of the air box to release them. Gently lift the top half of the air box and slide the two tabs on the left side out of their slots. |
||
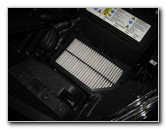 Engine Filter Exposed |
 Pull Out Old Air Filter |
 Old Engine Filter Removed |
| Pull the old engine air filter straight out of the lower half of the air box. | ||
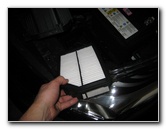
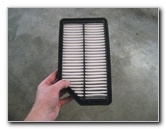
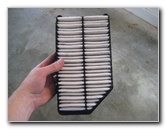 Inspect Both Sides |
 Clean With Vacuum |
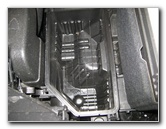 Clean Out Bottom Half Box |
| Inspect both sides
of the old air filter. If the old filter is relatively clean, just tap out the large debris and remove any fine dust with a vacuum. If the old filter is dark grey or black and clogged with dirt, dust, hair, insects, leaves, pollen, twigs and other debris, it should be replaced with a new element. I recommend buying the Fram CA11206 engine air filter since it has excellent reviews on Amazon. If your vacuum cleaner has a crevice attachment, clean out any dust or sand in the bottom half of the air box. |
||
|
|
||
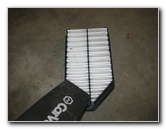
 Install New Engine Filter |
 Insert Tabs In To Slots |
 2nd Tab In Slot |
| Insert the new (or
cleaned) engine air filter in to the lower half of the air box with the
pleats facing down. Re-insert the two tabs on the left side of the air box cover in to their corresponding slots. Lower the top half of the air box back in to place. |
||
 Flip Up Metal Latch |
 Secure Second Metal Latch |
 Engine Air Filter Installed |
| Flip the two metal
latches on the left side of the air box up and over the cover to secure it
in place. Double check that the air box cover is securely in place with no part of the new filter visible at the edges. For more,
check out my other
2012-2016 Kia Rio DIY Repair & Maintenance Guides. |
||
| If you found this guide to be helpful,
please consider making a small donation by clicking on the PayPal.com
"Donate" button located to the right of this paragraph. Thank you!
(Note: I am not a registered charity. Donations are not tax deductible.) |