
Kia Sedona
Rear Wiper Blade Replacement Guide
How to change the rear window wiper blade
on the back windshield of a 3rd generation 2015 to 2018 Kia Sedona.

By Paul B. Michaels Author & Photographer Auto Mechanic Since 1989 |
||
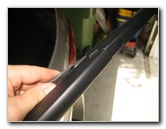
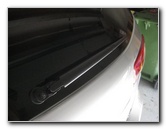
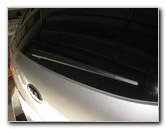 2015 Sedona Back Window |
 Rear Wiper Blade & Arm |
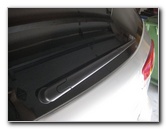
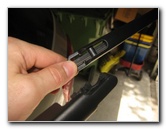
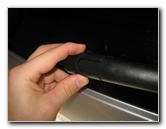
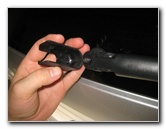 Pull Off Plastic Base Cap |
| This
automotive maintenance tutorial was specifically written to assist
owners of the third generation (2015, 2016, 2017, 2018 and perhaps
also the updated 2019 and 2020 model years) Kia Sedona minivan in
changing the rear wiper blade on the back windshield window. Owners of other Kia or Hyundai models such as the Grand Carnival, Sorento, Sportage, Niro, Soul, K900, Stinger, Cadenza, Optima, Rio, Forte, Genesis, Sonata, Ioniq, Santa Fe, Tucson, Elantra and Accent may also find these DIY instructions to be helpful. The compatible replacement OEM rear wiper blade part number is Kia or Hyundai 988502W000 which can be purchased online at Amazon or at your dealership. No tools are needed to remove the old wiper blade from the wiper arm and install the new one. |
||
|
|
||
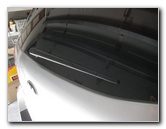
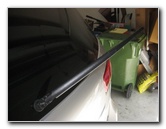 Lift Wiper Arm Off Window |
 Rotate Away Old Wiper Blade |
 Pop Bar Out of Socket |
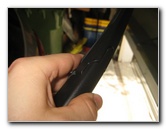
| The first step is
to gently pull the horseshoe shaped black plastic cover off the base of the
wiper arm. Set the base cap aside in a safe place. Gently lift the wiper blade off the back windshield window. Rotate the old wiper blade away from the wiper arm. Continue rotating the old wiper blade away from the wiper arm until you feel the mounting bar in the center of the old wiper blade pop out of the "C" shaped socket at the end of the wiper arm. |
||
 Old Wiper Blade Removed |
 "C" Shaped Socket |
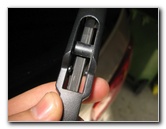 Mounting Bar - Wiper Blade |
| Once the old wiper blade is detached, you'll be able to clearly see the "C" shaped socket on the wiper arm and the mounting bar and two guide pegs on the old wiper blade. | ||
|
|
||
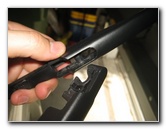 Line Up Bar & Socket |
 Push Bar Into Socket |
 Rotate Blade Parallel To Arm |
| I
recommend buying the OEM Hyundai / Kia replacement rear wiper blade which is
part number
988502W000. (It is also known as part # 98850-2W000, 98850 2W000, AMHM0624 or l5747591.1.) Line up the new wiper blade with the rubber blade facing towards the right (passenger) side of the minivan. Push the mounting bar in the middle of the new wiper blade into the socket at the end of the wiper arm. Make sure the two small guide pegs on the wiper blade are lined up with the slots on the wiper arm. Rotate the new wiper blade until it is parallel with the wiper arm. Double check that the new wiper blade is securely attached to the wiper arm. |
||
 Lower Blade To Window |
 Pop On Base Cover |
 Wiper Blade Replaced |
| Gently lower the
new wiper blade to the back window. Gently snap the plastic base cap on to the wiper arm over the metal nut. For the best wiper performance, I highly recommend thoroughly cleaning off the window and applying a glass treatment product that will repel water such as Rain-X. Be sure to record the rear wiper blade replacement in your minivan's service records. For more,
please check out all of my
Kia Sedona DIY Repair & Maintenance Guides. |
||
| If you found this guide to be helpful,
please consider making a small donation by clicking on the PayPal.com
"Donate" button located to the right of this paragraph. Thank you!
(Note: I am not a registered charity. Donations are not tax deductible.) |