
How To Replace Your CMOS Battery & Hard Drive In A Sager, ProStar or MTech Laptop - A Picture Illustrated Repair Guide.
|
Main Menu Home Digital Cameras Misc. Pictures Articles My Blog |
 First |
 Previous |
 Home |
 Next |
 Last |
Page 2 of 3
|
Here on page two of my repair guide for ProStar, Sager
and MTech laptops, you'll learn how to swap in a new hard drive and repair
your messed up CMOS battery wires by completely taking apart your laptop.
A replacement coin cell battery is part number CR2032 from various manufacturers such as Panasonic, Sony, Energizer, Duracell and Maxell. |
|
|
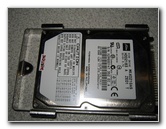
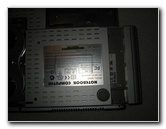
To the right is my old laptop hard drive with the metal bracket still attached. |
 |
|
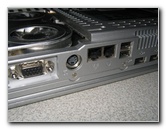
As I searched for more screws to remove I discovered the screws on the back of the laptop including the tiny silver ones, and the bolt screws that attach to the video and printer ports. |
 |
|
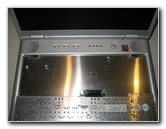
I also removed the keyboard by depressing the two black plastic clips that reside just below the speakers on each side of the laptop. The keyboard can be totally removed by pushing the brown tabs out of their sockets and pulling the thin plastic connector out of it's slot. |
 |
|
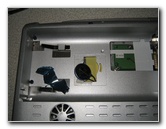
Then I removed the metal plate by taking out a few screws. |
 |
|
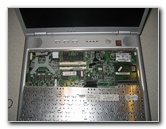
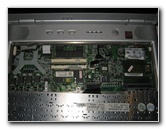
Below the keyboard and metal plate reside the RAM chips and the motherboard. |
 |
|
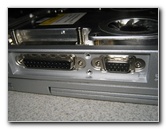
To completely take apart my Mtech/Sager/ProStar laptop I had to unscrew the hexagonal head screw bolts that the video monitor and printer cable connector screws into. |
 |
|
Pictured to the right are the connectors that I mentioned in the step above. |
 |
|
Next, I realized that I had to remove the DVD/CD-RW in order to split the laptop in half. Two screws had to be taken out in order to fully slide the DVD/CD-R drive out of the laptop body. |
 |
|
Here the drive is removed from the laptop body. |
 |
|
To the right is my old CR2032 CMOS battery without the blue heat shrink wrap plastic covering and the wire that I broke, that required all this extra work. If you were careful in removing the shrink wrap and the soldered on metal spade contacts, you should have been done on page 1 of this guide. |
 |
Main Menu Home My Digital Cameras Misc. Pictures Articles My Blog
|
First |
Previous |
Home |
Next |
Last |