
LiftMaster Key Fob Battery
Replacement Guide
How to change a dead battery in the
890MAX key fob remote control for a Chamberlain garage door opener.

By Paul B. Michaels Author & Photographer Auto Mechanic Since 1989 |
||
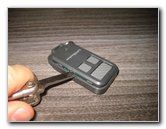
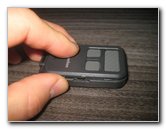
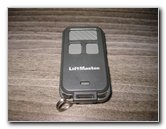 LiftMaster 890MAX |
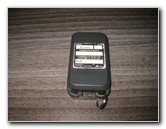 Back Side of Fob |
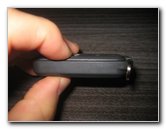
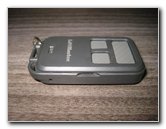 Right Side - Small Notch |
| This home
maintenance tutorial was specifically written to assist owners of the 890MAX
mini key fob remote control for a LiftMaster, Chamberlain, Craftsman or
Sears brand garage door openers in changing a weak or dead battery. Owners of other similar garage door opener remote control model numbers such as the G953EV-P2, KLIK3U-BK, 956EV, 953D, MC100-P2, 371LM, 953EV-P2, 373LM, 300 MC and 950CB may also find these DIY instructions to be helpful. The compatible replacement coin cell (also known as a "button" or "watch") battery is part number CR2032. The battery is available from various manufacturers such as Energizer, Panasonic, Duracell, Sony and Maxell. The only tool needed to access and replace the battery is a flathead screwdriver or a similar object such as a butter knife, nail file or a small coin. |
||
|
|
||
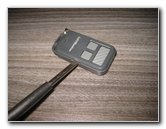 Insert Flathead Screwdriver |
 Pry Open Two Halves |
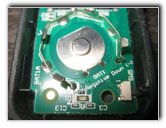
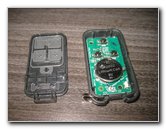 Top Cover Removed |
| Insert the blade of
your large flathead screwdriver into the notch on the right side of the fob. The plastic is relatively soft, so you can expect some minor damage to occur while prying apart the two halves of the fob. Gently twist the screwdriver to pop the top cover off the bottom of the fob's case. Set the top cover aside in a safe place. |
||
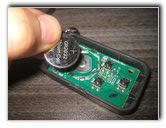
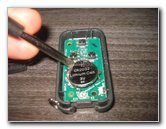 Pry Out Old Battery |
 Battery Out of Socket |
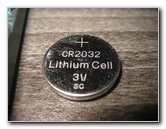 Old CR 2032 3V Battery |
| Gently push the old
battery out of the socket. Try to avoid bending the metal electrical contacts or scratching the green circuit board. |
||
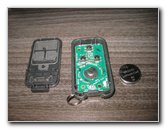
 Negative "-" Side Down |
 Install New Battery |
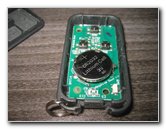 New Battery Installed |
|
Orientate the new battery with the negative "-"
side facing down and the positive "+" side facing up towards you. Carefully slide the new CR2032 battery into the holder. Make sure the new battery is fully seated in the socket. |
||
 Line Up Two Halves |
 Pop Together Fob Case |
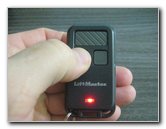 LED Light - Test Fob |
| Line up the top
cover with the bottom of the fob's case. Gently snap together the two halves of the fob together. Make sure that the two halves of the fob are flush together at every edge. To test the new battery, press any of the three buttons. If the new battery is working properly, you should see the red LED light illuminate on the bottom of the fob. You shouldn't need to re-program the fob for your garage door opener. Just changing the battery shouldn't clear the original programming. If you do need to re-program the fob, press the "Program" button on the control panel (such as the 888LM) or on the garage door opener itself. Then press the button on the fob that you would like to use. You should see the overhead lights flash if the programming was successful. For more,
check out all of my
Home DIY Repair &
Maintenance Guides. |
||
| If you found this guide to be helpful,
please consider making a small donation by clicking on the PayPal.com
"Donate" button located to the right of this paragraph. Thank you!
(Note: I am not a registered charity. Donations are not tax deductible.) |