
MINI Cooper 12V Battery &
Brake Fluid Reservoir Access Guide
How to access the 12 volt car battery and
the brake fluid reservoir in a 3rd generation 2014 to 2020 MINI Cooper.

By Paul B. Michaels Author & Photographer Auto Mechanic Since 1989 |
||
 2019 MINI Cooper |
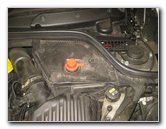
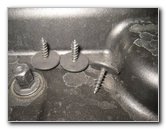
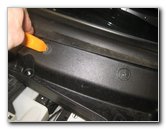
 Remove Three Screws |
|
| This automotive
maintenance tutorial was specifically written to assist owners of the 3rd
generation (2014, 2015, 2016, 2017, 2018, 2019 and 2020) MINI Cooper in
removing the plastic panel that covers the 12V automotive battery and the
brake fluid reservoir bottle. Owners of other MINI models or some smaller BMW vehicles such as the Cooper S, "JCW" John Cooper Works, Convertible, Hatch, Clubman, One, One First, One D, Coupe, Roadster, Countryman, Paceman, 3 Series, 318i, 328i, 320i, 323i, 325i, 330i, 340i, 230i, M240i, M2, M3, M4, i3, 228i, 230i, 128i, 135i, Z3, Z4 and Z8 may also find these DIY instructions to be helpful. The tools needed to complete this procedure include an 8mm socket, a 10mm socket, a 1/4" drive ratchet and a flathead screwdriver or a plastic pry bar tool. |
||
|
|
||
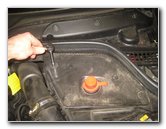
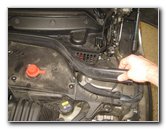
 Front Left Screw |
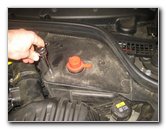
 Front Right Screw |
|
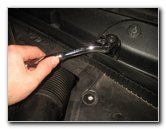
| The first steps are
to remove the three small screws on the top of the black plastic panel. You'll see the red plastic cover for the positive "+" jump start terminal in the center of the panel. Remove the three screws by turning them in the counterclockwise direction with an 8mm socket and a 1/4" drive ratchet. |
||
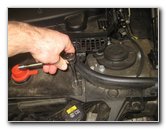
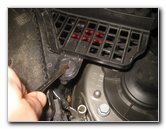
 Three Screws Removed |
 Pull Off Weather Stripping |
|
| Set the three
screws aside in a safe place. Gently pull the rubber weather stripping off the top of the plastic panel. |
||
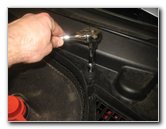
 Rotate Counterclockwise |
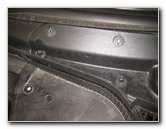 Two Black Metal Nuts |
|
| Then locate the two large black metal nuts on the cowl near the windshield. | ||
|
|
||
 Loosen Counterclockwise |
 Remove Second Nut |
|
| Loosen the two nuts by turning them in the counterclockwise direction with a 10mm socket and a 1/4" drive ratchet. | ||
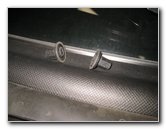 Two Nuts Removed |
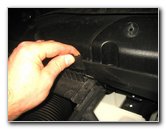 Pull Off Metal Clip |
|
| Set the two nuts
aside in a safe place. Pull the metal clip off the top edge of the panel. |
||
 Rotate Plastic Fasteners |
 Fasteners Unlocked |
|
| Then rotate the two black plastic fasteners on the top panel by turning them in the counterclockwise direction with a plastic pry bar tool. | ||
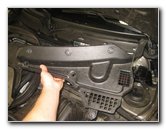 Pull Off Cowl Panel |
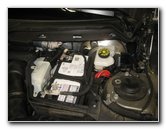 12V Battery & Brake Fluid |
|
| Pull the plastic
panel off the cowl area and away from the windshield. Set the panel aside in a safe place. Now you'll have access to the brake fluid reservoir tank and the 12 volt car battery. For more,
check out all of my
MINI Cooper DIY Repair & Maintenance Guides. |
||
| If you found this guide to be helpful,
please consider making a small donation by clicking on the PayPal.com
"Donate" button located to the right of this paragraph. Thank you!
(Note: I am not a registered charity. Donations are not tax deductible.) |