
MINI Cooper
Glove Box Light Bulb Replacement Guide
How to change a burnt out glove box light
bulb in a 3rd generation 2014 to 2020 MINI Cooper with the part number.

By Paul B. Michaels Author & Photographer Auto Mechanic Since 1989 |
||
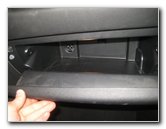
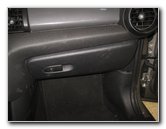 2019 MINI Glove Box |
 Open Glove Box - Empty |
|
| This automotive
maintenance tutorial was specifically written to assist owners of the 3rd
generation (2014, 2015, 2016, 2017, 2018, 2019 and 2020) MINI Cooper in
changing a burnt out light bulb located in the glove box (also known as the
"glove compartment") or upgrading it to a brighter LED unit. Owners of other MINI models or some smaller BMW vehicles such as the Cooper S, "JCW" John Cooper Works, Convertible, Hatch, Clubman, One, One First, One D, Coupe, Roadster, Countryman, Paceman, 3 Series, 318i, 328i, 320i, 323i, 325i, 330i, 340i, 230i, M240i, M2, M3, M4, i3, 228i, 230i, 128i, 135i, Z3, Z4 and Z8 may also find these DIY instructions to be helpful. The replacement miniature wedge base light bulb part number is 2825 (also known as # W5W). If you would like to have a brighter glove box light, install a compatible 2825 LED bulb. The only tool needed to access and replace the bulb is a small flathead screwdriver or a plastic pry bar tool. |
||
|
|
||
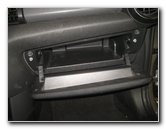
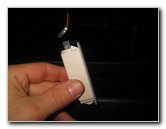
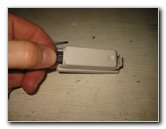
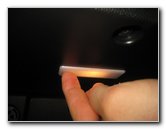
 Glove Box Light Housing |
 Insert Flathead Screwdriver |
|
| The first two steps
are to open the glove box and them empty out the contents such as the
owner's manual, registration, sunglasses, stack of fast food napkins, etc. To prevent from scratching the plastic surfaces, you can either cover the tip of your screwdriver with a thin micro fiber cloth or instead use a plastic pry bar tool. Insert the blade of the flathead screwdriver into the notch on the left (driver) side of the light housing. Gently pry out the light housing from the ceiling of the glove box. |
||
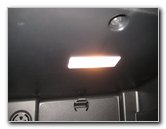
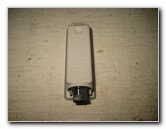
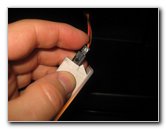
 Pull Out Light Housing |
 Black Power Plug |
|
| An optional step is
to disconnect the black plastic power plug. Push in the release tab on the electrical connector before sliding it straight out of its socket. |
||
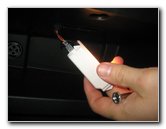
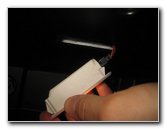
 Power Plug Disconnected |
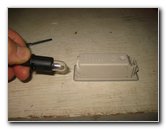 1/4 Turn Counterclockwise |
|
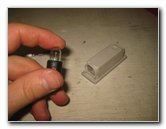
| Rotate the base of
the black plastic bulb socket 1/4 turn in the counterclockwise direction. Pull the socket straight out of the assembly. |
||
|
|
||
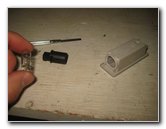 Pull Out Old Light Bulb |
 Push In New Light Bulb |
|
| Carefully pull the
old light bulb straight out of the socket. Push a new number 2825 (also known as # W5W) bulb straight into the socket. If you would like to have a brighter glove box light, install a compatible replacement 2825 LED bulb. (Tip - If you install an LED bulb and it doesn't work at first, try removing it, rotating it 180 degrees and pushing back into the socket. Some LED bulbs are polarized and will only work when the positive "+" and negative "-" electrical contacts are in the correct orientation. |
||
 1/4 Turn Clockwise - Lock |
 Push In Electrical Connector |
|
| Insert the bulb
socket into the housing and rotate it 1/4 turn in the clockwise direction to
secure it into place. If you removed the electrical connector, push the power plug straight into its socket. |
||
 Re-Insert Wires First |
 Pop In Retaining Clip |
|
| Re-insert the wires
and the right (passenger) side of the light housing back into the opening in
the roof of the glove box. Then gently snap in the retaining clip on the left (driver) side of the housing. |
||
 Replace Contents |
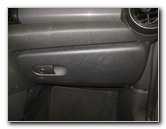 Close Glove Box |
|
| The new light bulb
should have turned on immediately after you re-inserted the power plug. If
not, press the "Unlock" button on the key fob to re-activate the interior
lights. To complete the job, replace the contents of the glove box and close it. Be sure to record the bulb change in your vehicle's service records. For more,
check out all of my
MINI Cooper DIY Repair & Maintenance Guides. |
||
| If you found this guide to be helpful,
please consider making a small donation by clicking on the PayPal.com
"Donate" button located to the right of this paragraph. Thank you!
(Note: I am not a registered charity. Donations are not tax deductible.) |