
MINI Cooper
Tail Light Bulbs Replacement Guide
How to change a burnt out brake, rear
turn signal, parking and reverse light bulbs in a 2014 to 2020 MINI Cooper.

By Paul B. Michaels Author & Photographer Auto Mechanic Since 1989 |
||
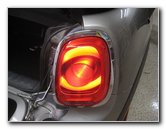
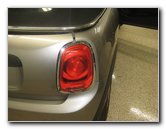 2019 MINI Tail Lights |
 Open Trunk Tailgate Door |
 Easy Load Lever |
| This automotive
maintenance tutorial was specifically written to assist owners of the 3rd
generation (2014, 2015, 2016, 2017, 2018, 2019 and 2020) MINI Cooper in
changing a burnt out brake, rear turn signal, reverse or parking bulb in the
tail light housings. Owners of other MINI models or some smaller BMW vehicles such as the Cooper S, "JCW" John Cooper Works, Convertible, Hatch, Clubman, One, One First, One D, Coupe, Roadster, Countryman, Paceman, 3 Series, 318i, 328i, 320i, 323i, 325i, 330i, 340i, 230i, M240i, M2, M3, M4, i3, 228i, 230i, 128i, 135i, Z3, Z4 and Z8 may also find these DIY instructions to be helpful. The compatible replacement light bulb part number for the 2018, 2019 and 2020 model years is P21W (also known as 7506 or 1057) for all of the positions. The earlier 2014, 2015, 2016 and 2017 model years also use the P21W (also known as # 7506 or 1057) light bulbs for the brake, rear turn signal and parking lights but instead use the smaller number 921 bulb for the reverse light. (Please check the part number on your old reverse light bulb before purchasing a new bulb.) No tools are needed to access and replace the tail light bulbs. |
||
|
|
||
 Left Easy Load Lever |
 Lift Up Trunk Lid / Top |
 Right Rear of Trunk |
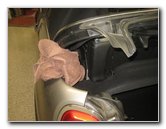
| The first two steps
are to open the tailgate door for the cargo area and then lift up the "Easy
Load" lid. To release the "Easy Load" lid for the trunk, pull up on the two levers. There is one lever on each side of the trunk. To hold the trunk lid in the raised position, wedge a towel into one of the two hinges. Move to the side of the vehicle with the burnt out tail light bulb. Locate the fabric access cover at the rear corner of the cargo area. |
||
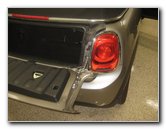
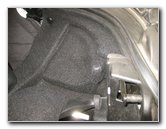
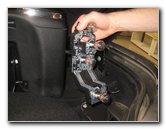
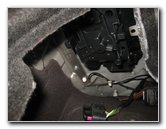
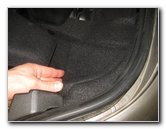
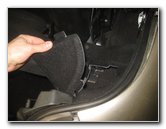 Pull Off Fabric Cover |
 Fabric Access Cover |
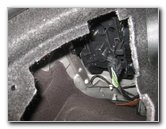 Rear of Tail Light Housing |
| Gently pull the
fabric access panel out of the rear corner of the trunk. Set the cover aside in a safe place. Once the cover is out of the way, you'll be able to see the black plastic bracket attached to the back side of the tail light housing. |
||
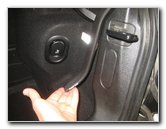
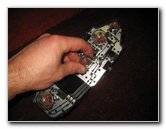
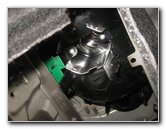
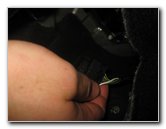
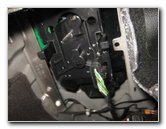
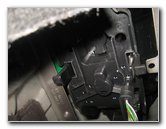 Two Plastic Release Tabs |
 Black Electrical Connector |
 Disconnect Power Plug |
| Push in the release tab on the black plastic electrical connector before sliding it straight out of its socket. | ||
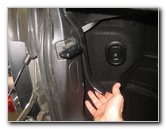
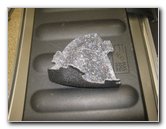
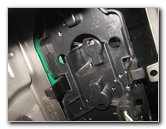
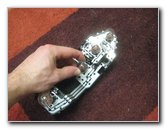
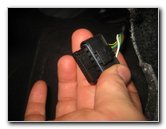
 Squeeze Together Tabs |
 Remove Bulb Bracket |
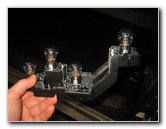 Bulb Holder Removed |
| Then gently squeeze
together the two black plastic tabs on either side of the bulb holder
bracket. Carefully pull the bulb bracket off the rear of the tail light housing. |
||
|
|
||
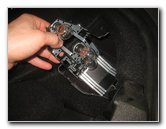
 Push Down & 1/4 Turn CC |
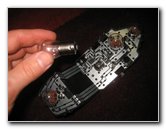 Old Light Bulb Removed |
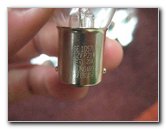 GE 1057 Light Bulb |
| The bulb bracket
contains the brake, rear turn signal, reverse and parking light bulbs. To remove any of the old bulbs, just push the old bulb down into the socket and rotate it 1/4 turn in the counterclockwise direction before pulling the old bulb straight out of the socket. The OEM light bulbs in this 2019 MINI Cooper Hatch were GE 1057LF (P21W). |
||
 Push Down & 1/4 Turn C. |
 Openings In Light Housing |
 Lower In Bulb Bracket |
| Push a new number
P21W light bulb down into the
socket and rotate it 1/4 turn in the clockwise direction to secure it into
place. If you would like to have brighter tail lights, install some compatible replacement P21W LED bulbs. I'd also recommend wiping the new bulb with a paper towel and some rubbing alcohol to clean it. If the new bulb has any oil or dirt on it from your fingers, it may operate at a slightly higher temperature and not last as long. Carefully lower the bulb holder bracket back down into the cargo area. |
||
 Push In To Secure |
 Bulb Bracket Replaced |
 Electrical Connector |
| Push in the bulb bracket to secure the two retaining clips. | ||
 Push In Power Plug |
 Replace Fabric Cover |
 Test New Tail Light Bulbs |
| Push the power plug
back into its socket on the back side of the bulb bracket. Replace the fabric access cover. To test the new light bulbs, have an assistant step on the brake pedal, activate the hazard signals and place the transmission into reverse. Be sure to record the bulb change in your vehicle's service records. For more,
check out all of my
MINI Cooper DIY Repair & Maintenance Guides. |
||
| If you found this guide to be helpful,
please consider making a small donation by clicking on the PayPal.com
"Donate" button located to the right of this paragraph. Thank you!
(Note: I am not a registered charity. Donations are not tax deductible.) |