
Mitsubishi
Outlander Sport Vanity Mirror Light Bulb Replacement Guide
How to change a burnt out vanity mirror
light bulb in the sun visor of a 3rd generation 2011-2107 Outlander Sport.

By Paul B. Michaels Author & Photographer Auto Mechanic Since 1989 |
||
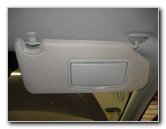 2015 Outlander Sport Sun Visor |
 Flip Open Vanity Mirror Cover |
|
| This
automotive maintenance tutorial was specifically written to assist
owners of the third generation (2011, 2012, 2013, 2014, 2015, 2016
and 2017) Mitsubishi Outlander Sport in changing a burnt out vanity
mirror light bulb in the sun visor. Owners of other Mitsubishi vehicles such as the Lancer, Outlander, Mirage, ASX, RVR, Galant, I-MIEV, Montero, Eclipse, 3000GT, Endeavor, Raider, Diamante, Attrage, Carisma, Colt, Grandis, Magna, Pajero and the Space Star may also find these DIY instructions to be helpful. The compatible replacement sub miniature wedge base bulb is part number 74. You can also use a brighter 74 LED bulb. The tools needed to access and replace the light bulbs include a small flathead screwdriver and a standard Phillips head screwdriver. |
||
|
|
||
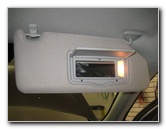
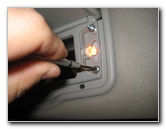
 Gently Pry Out Lens Cover |
 Old Light Bulb Exposed |
|
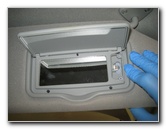
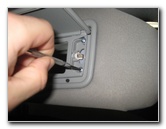
| The first two steps
are to lower the sun visor and flip open the mirror cover. To avoid scratching the plastic surfaces, you can either cover the tip of your screwdriver with a thin micro fiber cloth or use a plastic pry bar tool. Gently push the lens cover out of the housing. Apply force from the smaller side of the lens cover and slide it out away from the mirror. Set the lens cover aside in a safe place. |
||
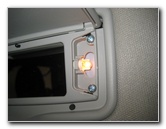
 Loosen Counterclockwise |
 Remove Phillips Head Screws |
|
| Loosen the two screws by turning them counterclockwise with the Phillips head screwdriver. | ||
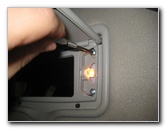
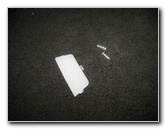 Two Screws & Lens Cover |
 Pull Out Mirror Assembly |
|
| Set the two screws
aside with the lens cover. Gently pull the mirror assembly out of the sun visor. |
||
|
|
||
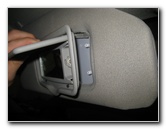
 Two Plastic Tabs |
 Tan Plastic Bulb Socket |
|
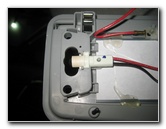
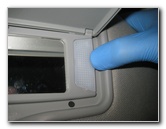
| Remove the two
plastic tabs on the other side of the mirror assembly out of the other side
of the sun visor. Turn over the sun visor to access the bulb socket. |
||
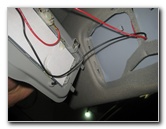
 Detach Bulb Socket |
 Pull Out Old Light Bulb |
|
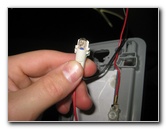
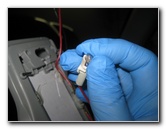
| Detach the bulb
socket from the back of the mirror assembly. Pull the old light bulb straight out of the socket. If you have trouble removing the old bulb, try putting on a nitrile rubber glove to get some extra grip. (I wasn't able to pull the old light bulb out of the socket. Since it was still working, I didn't try to forcefully pull it out.) Push a new sub miniature wedge base number 74 light bulb straight in to the socket. You can also use a brighter 74 LED bulb. |
||
 Re-Insert Mirror Assembly |
 Tighten Two Screws |
|
| Re-insert the two
plastic tabs on the mirror assembly back in to the sun visor.
Push the other side of the mirror assembly back in to place. Replace the two Phillips head screws and tighten them in the clockwise direction until they are snug. |
||
 Slide In Lens Cover |
 Test New Vanity Light |
|
| Gently slide the
lens cover in from the side and towards the mirror until it clicks securely
in to place. To test the new vanity light bulb, open and close the mirror cover. Or press the "Unlock" button on the key fob to activate the interior lights. For more,
check out all of my
2011-2017 Mitsubishi Outlander DIY Repair & Maintenance Guides. |
||
| If you found this guide to be helpful,
please consider making a small donation by clicking on the PayPal.com
"Donate" button located to the right of this paragraph. Thank you!
(Note: I am not a registered charity. Donations are not tax deductible.) |