
Nissan Armada
Vanity Mirror Light Bulb Replacement Guide
How to change a burnt out sun visor
vanity mirror light bulb in a 1st generation 2004-2015 Nissan Armada SUV.

By Paul B. Michaels Author & Photographer Auto Mechanic Since 1989 |
||
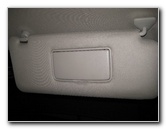 2012 Armada Sun Visor |
 Flip Open Vanity Mirror |
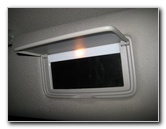
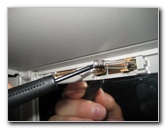
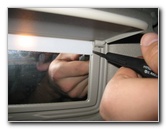 Pry Off Lens Cover |
| This
automotive "how-to" guide was specifically written to assist owners
of the 1st generation (2004, 2005, 2006, 2007, 2008, 2009, 2010,
2011, 2012, 2013, 2014 & 2015) Nissan Armada in changing a burnt out
vanity mirror light bulb in the sun visors. Owners of other Nissan or Infiniti vehicles such as the Versa, Cube, Sentra, Altima, LEAF, Maxima, 370Z, Juke, Rogue, Murano, Xterra, Pathfinder, Quest, Frontier, Titan, QX56, Q50, G37, EX37, QX60, FX37, FX50 and QX80 may also find these DIY instructions to be helpful. A replacement vanity mirror light bulb is either part # 13502343 from ACDelco or # TS-14V1CP from various manufacturers. Other compatible miniature "fuse" type bulbs include the # 6614F, Eiko 40842 - 6614F, Bulbrite 756320 - 6614F, and the Putco 230003 LED. The only tool needed to replace the vanity mirror bulb is a small flathead screwdriver used to pry off the plastic lens cover. |
||
|
|
||
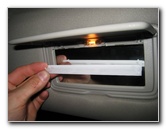 Lens Cover Removed |
 Pry Out Old Bulb |
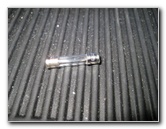 Old Vanity Bulb 12V 1.8W |
|
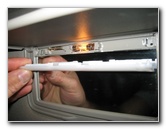
The first step is to flip open the mirror cover
on the sun visor.
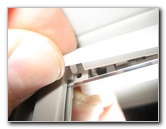
Then insert the blade of the small flathead screwdriver in to one of the the side edges of the translucent plastic lens cover before gently prying it out. Set the lens cover aside in a safe place. Either pull out the old bulb with your fingers or very carefully pry it out at one of the metal end caps with the small flathead screwdriver. |
||
|
|
||
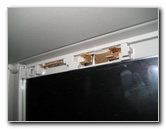 Vanity Bulb Socket |
 Push In New Bulb |
 Line Up Lens Cover |
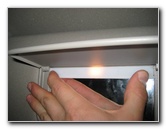
| Push in a new 12
volt 1.8 watt or 2 watt miniature fuse style bulb such as the #
ACDelco 13502343 or
# TS-14V1CP straight in to the socket. If you are installing an LED bulb and it doesn't work at first, try flipping it around in the socket 180 degrees. Line up the plastic lens cover over the bulb housing with the small pegs at the bottom. |
||
 Push Peg In To Hole |
 Snap Lens Cover In To Place |
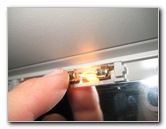
 Test New Vanity Light Bulb |
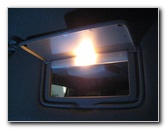
| Gently snap the
lens cover back in to place. Test that the new vanity bulb works properly by opening and closing the mirror cover several times. For more,
check out my other
Nissan
Armada Repair & Maintenance Guides. |
||
| If you found this guide to be helpful,
please consider making a small donation by clicking on the PayPal.com
"Donate" button located to the right of this paragraph. Thank you!
(Note: I am not a registered charity. Donations are not tax deductible.) |