
Nissan
Frontier Serpentine Belt Replacement Guide
How to change the serpentine accessory
belt on the VQ40DE 4.0L V6 engine in a 2005 to 2016 Nissan Frontier.

By Paul B. Michaels Author & Photographer Auto Mechanic Since 1989 |
||
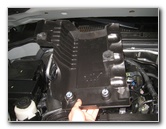
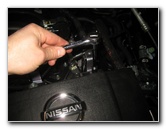
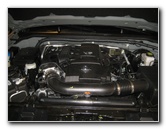 2016 Nissan Frontier |
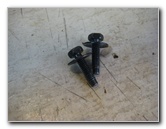
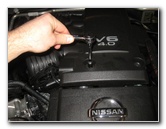 Engine Cover Screws |
 Loosen Counterclockwise |
| This
automotive maintenance tutorial was specifically written to assist
owners of the second generation "D40 Series" (2005, 2006, 2007,
2008, 2009, 2010, 2011, 2012, 2013, 2014, 2015 & 2016) Nissan
Frontier pickup truck with the VQ40DE 4.0 liter V6 engine in
replacing the serpentine accessory belt. Owners of other Nissan or Infiniti vehicles such as the Navara, Versa, Maxima, Juke, Rogue, Altima, Xterra, Pathfinder, Murano, Cube, Armada, Leaf, Quest, Sentra, Teana, 370Z, GT-R, Titan, G25, G37, M35, QX56, QX60 and M37 may also find these DIY instructions to be helpful. A few compatible replacement serpentine belts with their part numbers include the following: Continental Elite 4070873, Gates K070873, Bando 7PK2217 and Dayco 5070874. The tools needed to complete this procedure include a 10mm socket with a 1/4" drive ratchet, a flathead screwdriver and a 3/8" drive ratchet. |
||
|
|
||
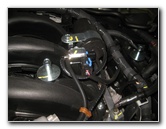
 2 Engine Cover Screws |
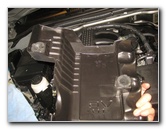
 Pull Off Engine Cover |
 Air Intake Bolts |
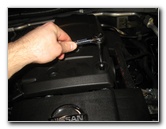
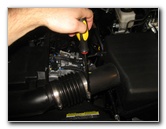
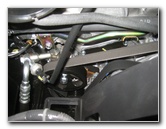
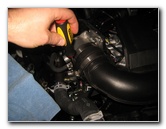
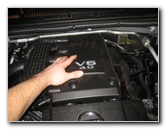
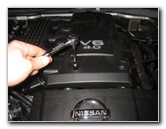
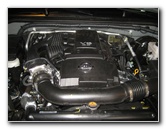
| The first two steps
are to open the hood and then locate the black metal screws that secure the
plastic engine cover in place. Remove the two screws by turning them counterclockwise with a 10mm socket and a 1/4" drive ratcheting wrench. Set the two screws aside in a safe place. Gently pull of the plastic engine cover and set it aside in a safe place. Once the engine cover is out of the way, you'll be able to see the two silver bolts that secure the air intake assembly to the top of the motor. |
||
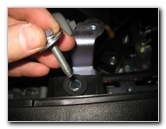
 Loosen Counterclockwise |
 Remove 2nd Bolt |
 Two 10mm Bolts |
| Loosen the two
silver bolts by turning them counterclockwise with the 10mm socket and 1/4"
drive ratcheting wrench. Set the two bolts aside in a safe place. |
||
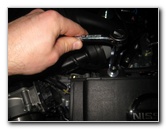
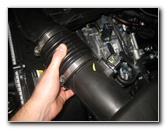
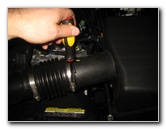
 Loosen Intake Hose Clamp |
 Loosen Air Box Hose Clamp |
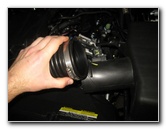 Pull Hose Off Air Box |
| Loosen the metal
hose clamp on the air intake tube (left side of the engine) by turning the
screw counterclockwise with a flathead screwdriver. Loosen the hose clamp on the air box (right side of the engine) by turning it counterclockwise with the flathead screwdriver. Pull the rubber hose off the engine air filter box. |
||
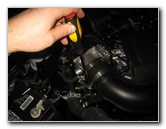
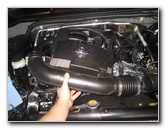
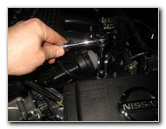
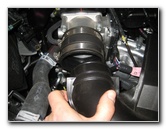 Pull Tube Out of Intake |
 Remove Air Intake Assembly |
 OEM Serpentine Belt |
| Pull the plastic
tube out of the engine air intake. Gently lift the air intake assembly off the top of the engine and set it aside in a safe place. |
||
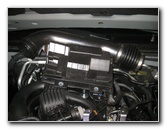
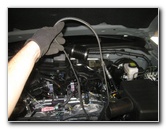
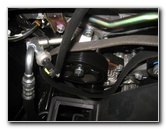
 Idler Pulley & Tensioner |
 Belt Routing Diagram |
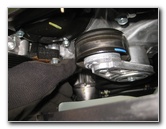
 Belt Tensioner Assembly |
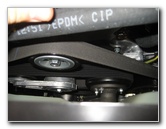
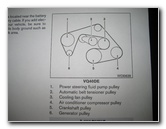
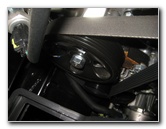
| Take a moment to
study how the OEM belt is routed around the pulleys. I've included a picture of the belt routing diagram for the VQ40DE 4.0L V6 engine. The silver metal belt tensioner assembly is located near the center of the engine. |
||
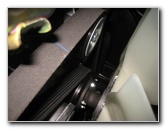
 Studying Belt Routing |
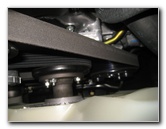 Crankshaft Pulley At Bottom |
 3/8" Drive Wrench |
| To rotate the tensioner arm and release the old belt, you'll need to use a 3/8" drive ratcheting wrench. | ||
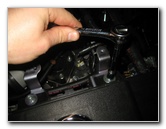
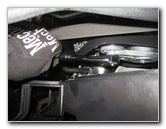
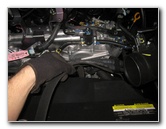
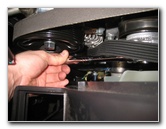
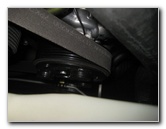
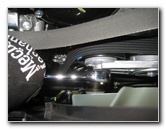 Turn Counterclockwise |
 Pull Belt Off Pulleys |
 Remove OEM Belt |
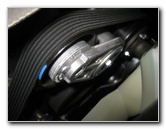
| Insert the 3/8"
drive ratcheting wrench in to the square hole on the end of the tensioner
assembly and firmly rotate it in the counterclockwise direction (to the left
towards the driver side). Hold the tensioner assembly down with one hand and pull the old belt off the top idler pulley with the other hand. |
||
|
|
||
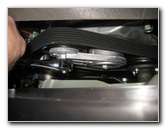
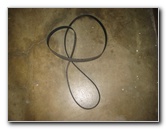 Serpentine Belt Removed |
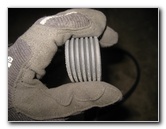 Inspect Old Belt For Cracks |
 Check Pulleys & Tensioner |
| Continue pulling
the old belt off the pulleys and remove it from the engine bay. Inspect the old belt for any cracks, frayed edges or missing chunks of rubber. If the old belt appears to be in good condition, consider keeping it as an emergency replacement part. I recommend buying the Continental Elite 4070873 replacement belt since it has excellent reviews on Amazon from other Frontier owners. If the tensioner assembly was very easy to turn or the old belt was loose, consider replacing the tensioner. A few compatible replacement tensioner assemblies with their part numbers are as follows: Gates 38378, ACDelco 38378, and Continental Elite 49394. Check the idler pulley and make sure that it spins freely. If the idler pulley doesn't turn easily, you should replace it with a new one. Replacement idler pulleys with their part numbers include the following: Dayco 89007, ACDelco 36222 and the Continental Elite 49148. |
||
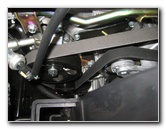
 Lower In New Belt |
 Route Belt Around Pulleys |
 Pull Belt Towards Tensioner |
| Lower the new
serpentine belt down in the front of the engine. A good guideline to remember is that the ribbed side of the belt goes around the ribbed pulleys and the smooth side of the belt goes against smooth pulleys. You can choose to either start routing the belt around the pulleys on the left side or the right side of the engine. I first routed the belt around the crankshaft pulley at the bottom of the engine, around the A/C (air conditioning) compressor pulley, around the cooling fan pulley, over the idler pulley at the top, over the left side of the power steering pump pulley, around the bottom of the alternator (generator) pulley and then towards the tensioner assembly. Pull the new belt firmly towards the tensioner pulley. |
||
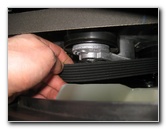
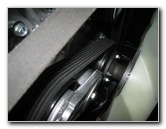
 Belt Over A/C Compressor |
 Insert 3/8" Drive Wrench |
 Release Tension - Push Down |
| Hold the belt in
place near the tensioner pulley with one hand. Insert the 3/8" drive ratcheting wrench in to the opening on the front of the tensioner arm. Firmly rotate the tensioner assembly down and in the counterclockwise direction. Carefully slip the new belt over the pulley before allowing the tensioner assembly to rotate up and to the right. |
||
 New Belt Installed |
 Double Check Belt Routing |
 Belt Seated On Pulleys |
|
|
||
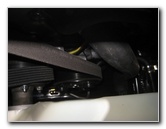
 Belt On Crankshaft |
 Line Up Air Intake Assembly |
 Push On Air Box Hose |
| Carefully lower the
air intake assembly back in to place over the top of the engine. Push the rubber hose over the engine air filter box. |
||
 Push On Air Intake Tube |
 Tighten Intake Clamp |
 Tighten Air Box Clamp |
| Push the plastic
tube in to the air intake manifold. Tighten the two hose clamps by rotating the screws clockwise with the flathead screwdriver. |
||
 Re-Insert 10mm Bolts |
 Tighten Clockwise |
 Secure Air Intake Assembly |
| Re-insert the two
silver 10mm bolts and tighten them in the clockwise direction until they are
snug. Try to avoid over tightening the bolts to prevent from cracking the plastic brackets. |
||
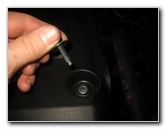
 Metal Mounting Peg |
 Rubber Friction Fasteners |
 Push On Plastic Engine Cover |
| Line up the two
rubber grommets on the underside of the plastic engine cover with their
corresponding metal pegs on the top of the engine. Firmly push the engine cover down in to place. |
||
 Re-Insert Two Screws |
 Tighten 10mm Clockwise |
 Serpentine Belt Replaced |
| Re-insert the two
black metal bolts and tighten them in the clockwise direction with the 10mm
socket and 1/4" drive ratcheting wrench to secure the engine cover in place. Avoid over tightening the bolts to prevent from cracking the plastic engine cover. Start the engine and listen closely for any strange sounds or noises that might indicate an improperly routed belt, a worn or frozen pulley or a faulty tensioner assembly. For more,
check out my other
Nissan Frontier DIY Repair & Maintenance Guides. |
||
| If you found this guide to be helpful,
please consider making a small donation by clicking on the PayPal.com
"Donate" button located to the right of this paragraph. Thank you!
(Note: I am not a registered charity. Donations are not tax deductible.) |