
Nissan Versa
Cabin Air Filter Replacement Guide
How to clean or replace the A/C system's
cabin air filter element in a 2007 to 2012 Nissan Versa hatchback or sedan.

By Paul B. Michaels Author & Photographer Auto Mechanic Since 1989 |
||
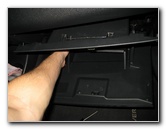
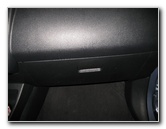
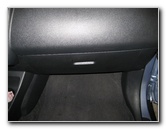 Nissan Versa Glove Box |
 Open Glove Box |
 Four Screws Along Top |
| This
automotive "how-to" guide was specifically written to assist owners
of the 1st generation 2007, 2008, 2009, 2010, 2011 & 2012 Nissan Versa hatchback or sedan in cleaning or
replacing the HVAC system's cabin air filter element. Owners of other related vehicles such as the Nissan Tiida, Latio, Cube, Leaf, Note, Micra, Wingroad, Grand Livina, Pulsar, Sunny, Almera, Aprio, Platina, Dodge Trazo, Dacia Logan, Sandero, Renault Clio, Modus, Twingo and the Nissan Grand Livina may also find these DIY instructions to be helpful. A few of the aftermarket cabin air filter elements compatible with the 2007-2012 Versa include the following with their part numbers: TYC 800101P, Fram CF10545, Wix 24829, Purolator C25877, Beck Arnley 042-2085, Mann MC 1063, Pentius PHB5877 and Ecogard XC25877. The only tool needed to access the filter is a standard Phillips head screwdriver. A wet/dry shop vacuum can be useful for cleaning the original OEM filter element. |
||
|
| |
||
 Four Screws Along Bottom |
 Remove Bottom 4 Screws |
 Left Side Bottom Screws |
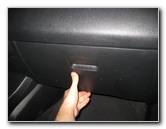
| The first steps are
to sit in the front passenger seat and locate the four Phillips head screws
just below the glove box. Remove the 4 lower screws with the Phillips head screwdriver and set them aside in a safe place. |
||
 |
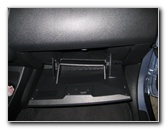
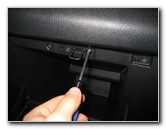
 Remove Top 4 Screws |
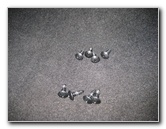 8 Glove Box Screws |
| Then open the glove box and remove the four Phillips head screws along the upper edge. | ||
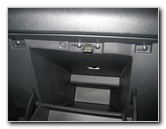
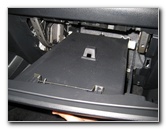
 Remove Glove Box |
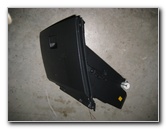 Glove Box Removed |
 Look In Left Rear Corner |
| Once all eight screws have been removed, you can carefully pull the glove box assembly out of the dashboard. | ||
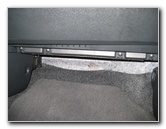
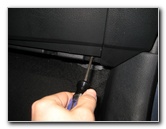
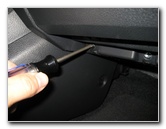
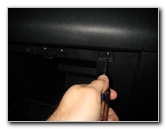
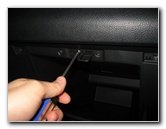
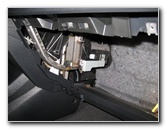
 Filter Cover Panel |
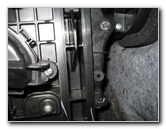 Pull Panel Handle "UP" |
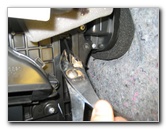 Lift Up Panel With Pliers |
|
|
||
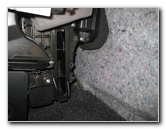
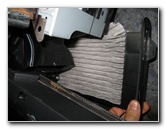
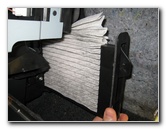
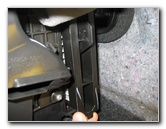
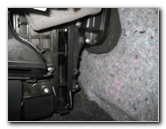
| Locate the black
plastic HVAC blower motor housing just in front of the passenger kick panel.
The cabin air filter tray is located near the firewall close to the front of the vehicle. It is a rectangular piece orientated vertically with the word "UP" and an arrow stamped on the plastic. To remove the filter element, push the handle on the tray up to unlock it. I found it difficult to move, so I used a pair of pliers to dislodge it. |
||
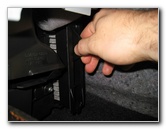 Pull Out Filter Tray |
 Sliding Out Cabin Air Filter |
 Filter Tray Removed |
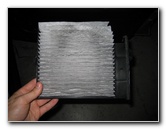
| Slide the filter
tray straight out towards the passenger side of the vehicle.
If the filter gets snagged on the way out, compress it with your other hand while pulling. |
||
 Clean Original Filter |
 Cabin Filter Receptacle |
 Slide In New Filter |
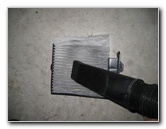
| If the old filter
element is relatively clean, just tap out the large debris and clean it with
a wet/dry shop vacuum. If your old filter is mostly black or clogged with dirt, dust, hair, insects, leaves and other debris, it should be replaced with a brand new element. I recommend buying the TYC 800101P cabin air filter since it has excellent reviews on Amazon. If you've had problems with your A/C system smelling musty or moldy, try using a Fram CF10545 "Fresh Breeze" filter that has Arm & Hammer baking soda and carbon in it to help absorb odors. Slide in the new cabin filter with the "UP" arrow pointing at the windshield. If you have trouble sliding it in, compress the pleats of the filter element before inserting it. |
||
 Filter Tray Inserted |
 Insert Tab In Notch |
 Pull Down - Snap In Place |
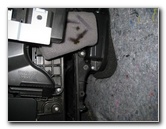
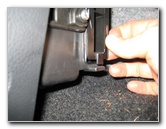
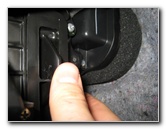
| Once the filter is
all the way in, insert the tab at the bottom into the slot on the blower
motor housing. Push down on the filter tray until it snaps in place. Double check that the filter tray is secure before moving on to the next step. |
||
 New Cabin Filter Installed |
 Re-Install Glove Box |
 Push Glove Box In Place |
| Carefully line up
the glove box and push it back into the dashboard. Hold the bottom edge of the glove box while opening the door. |
||
 Tighten 4 Upper Screws |
 Tighten 4 Lower Screws |
 Glove Box Re-Installed |
| Tighten the four
upper Phillips head screws.
Close the glove box door and insert the four lower Phillips head screws. For more, check out my other
Nissan Versa Repair & Maintenance Guides. |
||
| If you found this guide to be helpful,
please consider making a small donation by clicking on the PayPal.com
"Donate" button located to the right of this paragraph. Thank you!
(Note: I am not a registered charity. Donations are not tax deductible.) |