
Smart Fortwo
3rd Brake Light Bulb Replacement Guide
How to change a burnt out high mount
third brake light bulb on a 2nd generation 2008 to 2014 Smart Fortwo.

By Paul B. Michaels Author & Photographer Auto Mechanic Since 1989 |
||
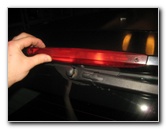
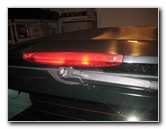 2013 Fortwo 3rd Brake Light |
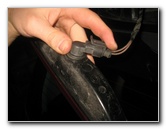
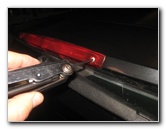
 Loosen Counterclockwise |
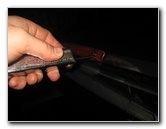 Remove 2nd Screw |
| This
automotive maintenance tutorial was specifically written to assist
owners of the second generation (2008, 2009, 2010, 2011, 2012, 2013
and 2014) Smart Fortwo compact city car in changing a burnt out high
mount third brake light bulb on the top rear of the vehicle. Owners of any Smart Fortwo models or trim levels such as the coupe hatchback, cabriolet or "cabrio", electric, pure, passion, forfour, prime and proxy may also find these DIY instructions to be helpful. The compatible replacement miniature wedge base light bulb is part number 921 (also known as part number W16W). You can also use a brighter LED unit. The only tool needed to remove the light housing and access the bulb is a Torx T-10 star bit screwdriver. |
||
|
|
||
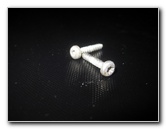 Two Screws Removed |
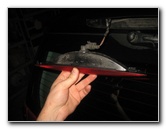 Pull Off Light Housing |
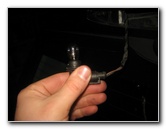
 1/4 Turn Counterclockwise |
| There are two
screws holding the high mount brake light housing in place with one located
on the left (driver) side and another on the right (passenger) side. Remove the two screws by turning them counterclockwise with a small Torx T10 star bit screwdriver. Set the two screws aside in a safe place. Gently pull the light housing off the rear of the car and turn it over to access the bulb socket. Rotate the base of the bulb socket 1/4 turn counterclockwise before pulling it straight out of the housing. |
||
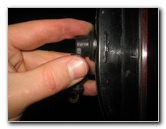
 Remove Bulb Socket |
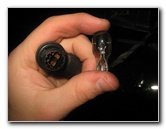 Pull Out Old Light Bulb |
 Push In New Light Bulb |
| Pull the old light
bulb straight out of the socket. If you have trouble removing the old bulb, try gently wiggling it back and forth while pulling. Push a new number 921 light bulb straight in to the socket. If you would like to have a brighter 3rd brake light, choose a compatible LED light bulb. |
||
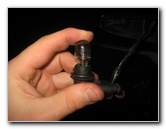
 1/4 Turn Clockwise - Lock |
 Replace Light Housing |
 Tighten Two Screws |
| Re-insert the bulb
socket in to the housing and rotate it 1/4 turn clockwise to secure it in
place. Line up the light housing and push it back in to place at the top of the car. Replace the two screws by turning them clockwise with the Torx T-10 screwdriver. For more, check out all of my
2008-2014 Smart Fortwo DIY Repair & Maintenance Guides. |
||
| If you found this guide to be helpful,
please consider making a small donation by clicking on the PayPal.com
"Donate" button located to the right of this paragraph. Thank you!
(Note: I am not a registered charity. Donations are not tax deductible.) |