
Subaru
Outback Serpentine Belt Replacement Guide
How to change the serpentine accessory
belt on the FB25 engine in a 5th generation 2015 to 2019 Subaru Outback.

By Paul B. Michaels Author & Photographer Auto Mechanic Since 1989 |
||
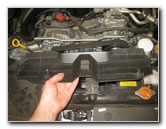
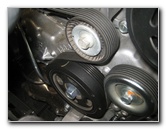
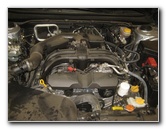 2017 Outback FB25 Engine |
 Black Plastic Cover |
 Loosen Counterclockwise |
| This automotive maintenance tutorial
was specifically written to assist owners of the fifth generation
(2015, 2016, 2017, 2018 and 2019
model years) Subaru Outback station wagon in checking or changing
the serpentine accessory belt (also known as the "fan" or "v-rib"
belt) on the FB25 2.5 liter four cylinder Boxer engine. Owners of other Subaru vehicles such as the Forester, Impreza, Legacy, XV Crosstrek, WRX, BRZ, SVX, Tribeca, Exiga, Trezia, Levorg and Baja may also find these DIY instructions to be helpful. A few compatible replacement serpentine belts with their part numbers are as follows: Dayco 5060780, Continental Elite 4060780, Gates K060780, ACDelco 6K780 and the genuine OEM Subaru 23780AA010. The tools needed to remove and replace the belt include a 10mm socket with a 1/4" drive ratchet, a 15mm socket and either a 3/8" or 1/2" drive ratchet. |
||
|
|
||
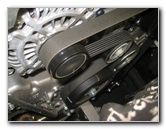
 Single Bolt Removed |
 Pull Off Black Plastic Cover |
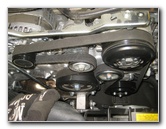
 Belt & Pulleys Exposed |
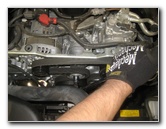
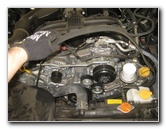
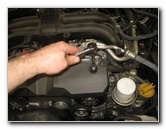
| The first two steps
are to open the hood and then locate the black plastic cover on the top
front area of the engine. Remove the single bolt that secures the plastic cover in place by turning it in the counterclockwise direction with a 10mm socket and a 1/4" drive ratchet. Set the bolt aside in a safe place. |
||
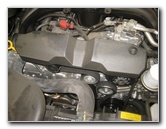
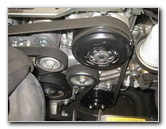
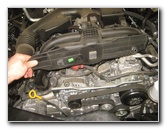
 Alternator, Tensioner, C/S |
 Study Belt Routing |
 Coolant Pump - Bottom |
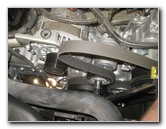
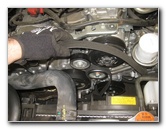
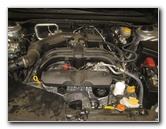
| Take a moment to examine how the old belt is routed around the various pulleys including the alternator, tensioner, crankshaft, idler, A/C compressor and coolant (water) pump. | ||
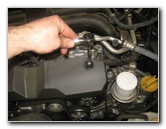
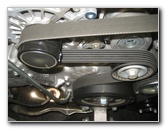
 Tensioner & Idler Pulleys |
 Alternator & Crankshaft |
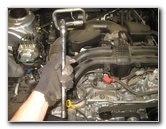 15mm Socket & Wrench |
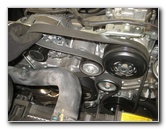
| Attach a 15mm
socket to a 3/8" drive, or preferably, a long handled 1/2" drive
non-ratcheting wrench. (If you have a Subaru Forester, follow my Subaru Forester Serpentine Belt Replacement Guide. The Forester has the same FB25 engine but the tensioner pulley was equipped with a 14mm bolt head instead of a 15mm like the Outback.) |
||
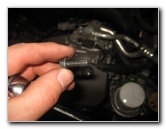
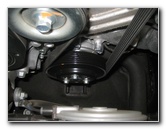
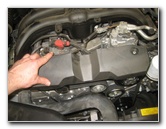
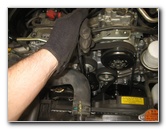 Attach Socket To Tensioner |
 Rotate Wrench To Right |
 Slip Belt Off Pulleys |
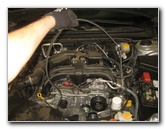
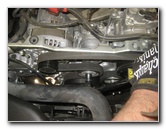
| Securely place the
15mm socket over the bolt head on the end of the tensioner pulley and arm
assembly. Firmly rotate the wrench to the right (driver) side of the engine bay. This will cause the tensioner arm to move to the left (passenger) side of the engine and release the tension on the old belt. |
||
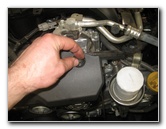
 Lift Out Old Belt |
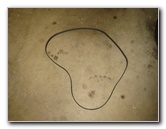 Inspect Old OEM Belt |
 Lower In New Belt |
| Carefully slip the
old belt off the pulleys. Do NOT place your fingers in between the belt and any of the pulleys! Inspect the old OEM belt for damage, tears, rips, missing chunks of rubber, exposed metal wires or any other unusual wear. If the old belt is in relatively good condition, consider saving it in your cargo area or garage as a spare part just in case the new belt fails prematurely. Check to make sure that the tensioner and idler pulleys can be spun easily. If the pulleys do not spin easily or wobble, they need to be replaced. A replacement idler pulley is part number Subaru 23770 AA070. A compatible replacement aftermarket tensioner pulley is part number Dayco 89505. If the tensioner assembly seemed really easy to rotate / release and the old belt was loose, consider replacing the entire tensioner assembly. The replacement OEM part numbers are Subaru 23769AA040 or Subaru 23769AA05A. I recommend purchasing the genuine OEM Subaru 23780AA010 serpentine belt. Carefully lower the new belt down into the front of the engine. The ribbed side of the belt should be facing in towards the center of the engine. |
||
|
|
||
 Wrap Around Pulleys |
 Hold Last Loop |
 Release Tensioner |
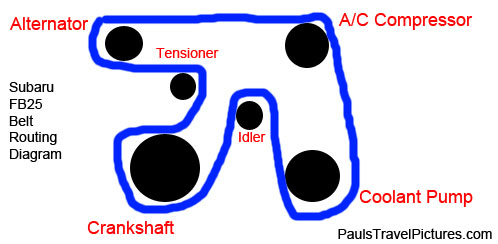
| A good rule to
remember is that the ribbed part of the new belt should be wrapped around
ribbed pulleys and the smooth side of the belt should be against the smooth
pulleys. I created a very simple belt routing diagram.
I began by wrapping the ribbed side of the belt around the large ribbed crankshaft pulley near the bottom left side of the engine, then I went up and over the smooth silver idler pulley, around the ribbed coolant pump pulley, up and over the ribbed A/C compressor, over to the left and around the ribbed alternator pulley and then pull the last loop towards the tensioner pulley. Alternatively, you could hold the last loop near the alternator. Place the 15m socket and 1/2" drive wrench over the bolt head on the tensioner pulley. While holding the last loop of the belt with one hand, rotate the wrench with your other hand to release the tensioner assembly. Carefully slip the last loop of the belt over the tensioner pulley or the alternator pulley. Do NOT place your fingers in between the pulley and new belt to avoid having them be caught and pinched. |
||
 New Belt Installed |
 Lower Black Plastic Cover |
 Push Cover Into Place |
| Carefully release
the tensioner arm to place tension on the new belt. Double check that the new belt is properly routed around the various pulleys. Make sure that the belt is fully seated on the ribbed pulleys. Lower the black plastic cover back into place on the front top part of the engine. |
||
 Spin In 10mm Bolt |
 Tighten Bolt Clockwise |
 Belt Replacement Complete |
| Re-insert the 10mm
bolt and spin it in a few turns by hand in the clockwise direction to
prevent it from becoming cross threaded. Tighten the bolt in the clockwise direction with the 10mm socket and a 1/4" drive ratchet until it is snug. Avoid over tightening the bolt to prevent from cracking the plastic cover. Start the engine and listen closely for any strange sounds or noises. If you do hear anything strange, immediately turn off the ignition. If you hear an occasional "chirp, chirp, chirp" sound, the tensioner assembly might be worn out and it is unable to apply the correct amount of tension on the new belt to allow it to run quietly. Be sure to record the belt change in your vehicle's service records. For more,
please check out all of my
2015-2018 Subaru Outback DIY Repair & Maintenance Guides. |
||
| If you found this guide to be helpful,
please consider making a small donation by clicking on the PayPal.com
"Donate" button located to the right of this paragraph. Thank you!
(Note: I am not a registered charity. Donations are not tax deductible.) |