
Toyota Camry
Electrical Fuse Replacement Guide
How to replace a blown electrical fuse in
an XV40 2007 to 2011 Toyota Camry with picture illustrated instructions.

By Paul B. Michaels Author & Photographer Auto Mechanic Since 1989 |
||
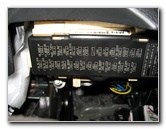
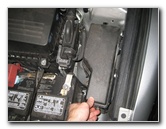
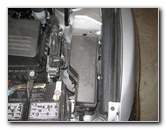 Engine Bay Fuse Box |
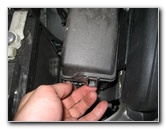 Lift Up Release Tab |
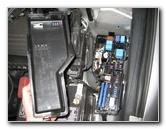 Fuse Box Cover Removed |
| This
automotive maintenance "how-to" guide was specifically written to
assist owners of the XV40 sixth generation (2007, 2008, 2009, 2010 & 2011) Toyota Camry sedan
in replacing a blown electrical fuse. Owners of other similar Toyota, Lexus or Scion vehicles such as the Corolla, Matrix, Yaris, Avalon, Venza, RAV4, FJ Cruiser, Highlander, 4Runner, Sequoia, Land Cruiser, Tacoma, Sienna, Aurion, IS 250, IS 350, ES 350, GS 350, LS 460, tC, xB, xD, iQ and may also find guide to be helpful. The 07-11 Camry contains one fuse box in the engine bay next to the battery and another below the dashboard by the driver's left knee.It is equipped with low profile mini blade fuses that can be purchased at Walmart, any auto parts store or online at Amazon. To replace any of the fuses, use the fuse puller tool located on the underside of the fuse box cover in the engine bay. There are also a few spare fuses situated next to the fuse puller tool. |
||
|
|
||
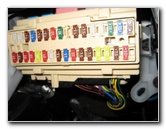
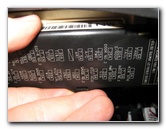
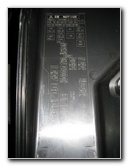 Fuse Location Chart |
 Under Dash Fuse Box |
 Remove Fuse Box Cover |
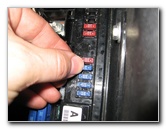
| To remove the top
cover of the fuse box in the engine compartment, lift up on the release tab
located on the side closest to the front bumper.
On the underside of the cover, you'll find a fuse location chart, a white fuse puller tool and also several spare fuses. A few of the fuses located in the engine compartment fuse box include for the cooling fans, the rear window defogger, the "ABS" anti-lock brake system, the vehicle stability control system, traction control system, brake assist system, the horn, the dome light, the alternator, the radio amplifier, the power seats, the hazard signals, the headlights, and the air conditioning system. The 2nd fuse box is located underneath the dashboard on the driver side in front of the driver's left knee. Gently pull off the black plastic cover to access the fuses. A few of the fuses in the fuse box under the instrument panel include the power windows, the fog lights, the 3rd / high mount brake light, the 2nd radio fuse, the windshield washer sprayer, the 12V power outlet, the sunroof, the tail lights, the gauges, and the 2nd A/C system fuse. |
||
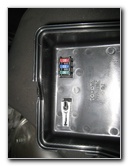
 Under Dashboard Fuses |
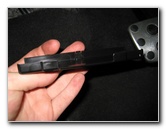
 Fuse Puller Tool & Spares |
 Using Fuse Puller Tool |
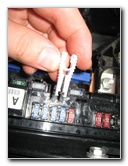
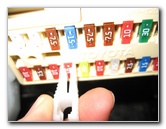
| Use the fuse box
location charts on the engine bay or passenger compartment fuse box covers
to locate the possibly blown fuse that needs to be checked or replaced.
There are also charts in the owner's manual. Take the white fuse puller tool off the underside of the engine bay fuse box cover. Squeeze the larger end to open the fuse puller tool and latch the smaller end on the head of the fuse. Then gently pull the fuse out of the fuse box while holding your other hand under the fuse puller tool to prevent the fuse from falling into the engine bay. |
||
|
|
||
 Pull Out Blown Fuse |
 Fuse Removed |
 New Fuse Intact |
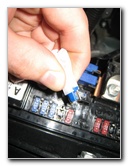
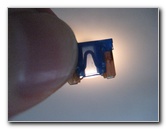
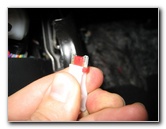
| Hold the fuse up to
a light source to check whether or not it has been blown.
If you see a break in the thin metal strip inside the plastic fuse, then it has been blown and needs to be replaced. If the thin metal strip runs all the way through the center of the fuse without any interruptions, it is in good working order and does not need to be replaced. |
||
 Push In New Fuse |
 Pulling Out Fuse In Car |
 Check Fuse - Intact |
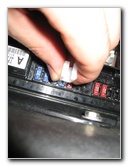
| Repeat the process
for any fuse that you suspect might be blown in the passenger compartment
fuse box.
When in doubt, replace the fuse for any electrical device in the vehicle that is not working properly to help rule a defective fuse as the problem. |
||
 Push In Electrical Fuse |
 Replace Fuse Box Cover |
 Snap On Fuse Box Cover |
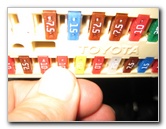
| Double check your
new fuse by holding it up to a light source before pushing it straight into
the fuse box.
The new low profile mini blade fuse can be pushed in either way, but aligning it so that the amperage number matches the other fuses in the fuse box is best. For more,
check out my
Toyota
Camry Repair & Maintenance Guides page. |
||
| If you found this guide to be helpful,
please consider making a small donation by clicking on the PayPal.com
"Donate" button located to the right of this paragraph. Thank you!
(Note: I am not a registered charity. Donations are not tax deductible.) |