
Toyota
Corolla Cabin Air Filter Replacement Guide
Pictures illustrated step by step "how
to" instructions for replacing an old cabin air filter in a 2005 Toyota Corolla
S.

| This guide was specifically written to assist owners of the 2005 Toyota Corolla S sedan in swapping out an old A/C cabin air filter with a new one. Owners of any "Ninth Generation" Corolla (2003, 2004, 2005, 2006, 2007, 2008) may also find this guide to be useful. I am not a professional mechanic. I assume no liability for any injuries or damage. Please proceed with caution. | ||
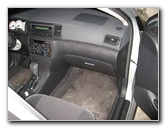 2005 Toyota Corolla S |
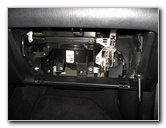
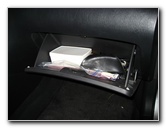 Corolla Glove Box Opened |
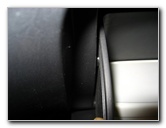
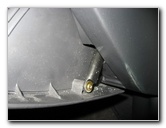
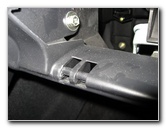
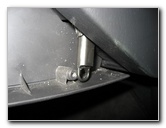
 Right Side Glove Box Latch |
| The
"Scheduled Maintenance Guide" for this 2005 Toyota Corolla S sedan
suggests that the air conditioner's cabin air filter should be cleaned
every 15,000 miles and replaced every 30,000 miles.
We neglected to inspect, clean or replace
it for over 65,000 miles.
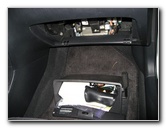
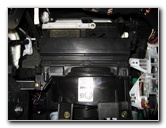
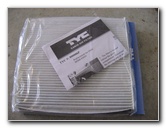
The new cabin air filter is a TYC brand filter (part # 800006P) that replaces the OEM Toyota filter (part # 88568-02020). To access the cabin air filter's housing, the glove box must be opened and removed. The easiest way to detach the glove box is to first remove the screw that attaches the retaining arm to the right hand side of the glove box. (See picture # 12.) A few other compatible replacement cabin air filters with their part numbers are as follows: Fram CF10133, Denso 453-2039, Cleenaire CAF10133, Wix 24873, K&N VF2003, Purolator C35491, Bosch P3754 and Toyota 88568-02020. |
||
|
|
||
 Left Side Glove Box Tab |
 Glove Box & Retaining Arm |
 Cabin Air Filter Housing |
| If you skip that
first step, the entire retaining arm may become disconnected from the rest
of the car and must be re-attached later.
As you can see in the middle image in the row above, I pulled off the glove box with the retaining arm still attached. To do the job correctly for this guide, I removing the retaining arm screw, re-attached the arm to the car, re-installed the glove box and started over again. |
||
 TYC Cabin Air Filter |
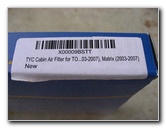 X00009BSTT |
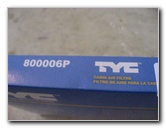 TYC 800006P |
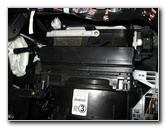
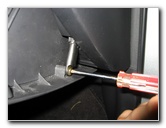
| Once you have the
screw on the retaining arm (picture
# 12) removed, you can press each side of the glove box inwards to pop
out the latches.
When both the right side and left side tabs are popped out of their tracks, the glove box will swing downwards. Then the glove box can be completely removed by gently pulling the entire unit towards the rear of the car. This will dislodge the semi-circle mounts on the bottom of the glove box that snap around the round pieces of plastic on the dash. See picture # 25 and picture # 26 to see what I'm referring to. |
||
 New Cabin Air Filter |
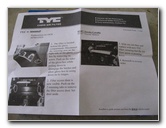 TYC Instructions Paper |
 Retaining Arm & Screw |
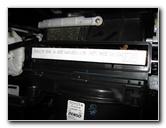
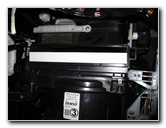
| With the glove box
fully removed, you can now easily access the cabin air filter access door.
The access door has a plastic tab or snap connector on each side. To remove it, press the tabs inwards towards each other and then gently pull it off. The cover should come off easily, so don't force it. |
||
 Unscrewing Retaining Arm |
 Glove Box Removed |
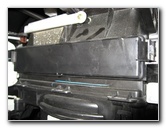 Cabin Air Filter Access Cover |
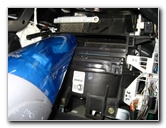
| After removing the
cabin air filter access cover, gently pull out the filter so that you don't
spill all the dust, debris or leaves in to the HVAC system's fan that lies
right below the filter housing.
I recommend buying the TYC 800006P filter since it has excellent reviews on Amazon. If you've had a problem with your A/C system smelling moldy or musty, try using the Fram CF10133 filter which has Arm & Hammer baking soda and carbon in it to help absorb odors. |
||
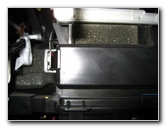 Left Side Cover Tab |
 Right Side Cover Tab |
 Removing Access Cover |
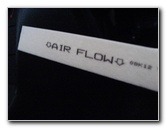
| Just like home air
conditioner filters, the cabin air filter should be inserted in a certain
way to allow optimum air flow.
The filter has arrows and the words "Air Flow" on it to help you orientate the filter in the correct position. |
||
 Cabin Filter Cover Removed |
 Old Dirty Cabin Air Filter |
 Vacuuming Out Leaves & Dust |
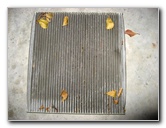
| In the picture
above, you can see the old cabin air filter covered in leaves and stained
grey from smog.
I used a small vacuum cleaner with a long nose attachment on it to suck out any leaves or debris that may have been left behind in the cabin air filter cavity. |
||
 Filter - Air Flow (Down) |
 New Filter Inserted |
 Access Cover Re-Attached |
| I double checked
the correct position for the proper air flow direction and then slid the new
filter into the housing.
The cabin air filter access cover snaps back into place. |
||
 Glove Box Plastic Hinges |
 Latches On Glove Box |
 Push Latches On Hinges |
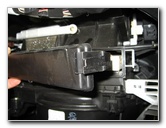
| To put the glove
box back in place, line up the plastic hinges with the semi-circle latches
on the glove box and push until they snap together.
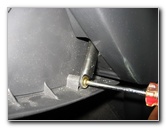
Then you can swing the glove box upwards, screw in the retaining arm, and pop the tabs on either side. If done correctly, the glove box should raise and lower in a controlled manner with smooth movements. With the new filter installed, I immediately noticed that the air conditioning system blew air out with slightly greater force, the car seemed to cool down more quickly and the air no longer had a stale smell. Be sure to record the filter change in your car's service records. |
||
 Snapping On Retaining Arm |
 Fastening Retaining Arm Screw |
 Glove Box Re-Installed |
|
For more, check out my other 2003-2008 Toyota Corolla Repair & Maintenance Guides. If you have a newer model check out my 2009-2013 Toyota Corolla Repair & Maintenance Guides.
For more, please take a look at
these related links:
Toyota Corolla Engine Oil Change Guide,
Toyota Corolla Timing Chain Tensioner Replacement Guide,
Toyota Corolla Headlight Bulbs Replacement Guide,
Toyota Corolla
Front Brake Pads Replacement Guide,
K&N Air Filter Cleaning Guide,
Buffing Old Faded Headlights Guide,
Headlight or Tail Light Condensation Solution Guide,
WeatherTech FloorLiner Review. |
||
| If you found this guide to be helpful,
please consider making a small donation by clicking on the PayPal.com
"Donate" button located to the right of this paragraph. Thank you!
(Note: I am not a registered charity. Donations are not tax deductible.) |