
Toyota Tacoma
Serpentine Accessory Belt Replacement Guide
How to change the serpentine accessory
drive belt on the 1GR-FE 4.0L V6 engine in a 2005 to 2015 Toyota Tacoma.

By Paul B. Michaels Author & Photographer Auto Mechanic Since 1989 |
||
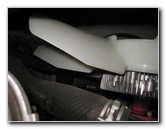
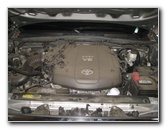 2013 Tacoma 4.0L V6 |
 Serpentine Accessory Belt |
 Under Engine Skid Plate |
| This
automotive maintenance DIY tutorial was specifically written to
assist owners of the second generation (2005, 2006, 2007, 2008,
2009, 2010, 2011, 2012, 2013, 2014 or 2015) Toyota Tacoma pickup
truck in changing the serpentine accessory drive belt on the 1GR-FE
4.0 liter V6 motor. Owners of other Toyota, Lexus or Scion vehicles such as the Yaris, Matrix, Prius, Camry, Corolla, Sienna, RAV4, Tundra, FJ Cruiser, Venza, Highlander, Avalon, Sequoia, Hilux, Land Cruiser, IS 250, ES 350, GS 350, tC, xB, xD, iQ and FR-S may also find these DIY instructions to be helpful. A few compatible replacement belts with their part numbers are as follows: Continental Elite 4070834, Bando # 7PK2120, Dayco 5070835 and Gates K070834 Multi V-Groove. The tools needed to complete this procedure include a 10mm socket, 12mm socket, 14mm socket and 1/4" drive, 3/8" drive and/or 1/2" drive ratchets. |
||
|
|
||
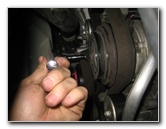
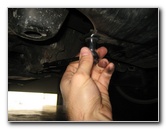
 Loosen 12mm Bolt |
 2nd Front 12mm Bolt |
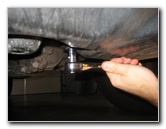 Rear 12mm Bolts |
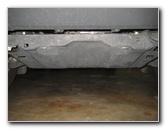
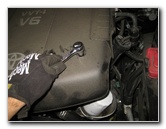
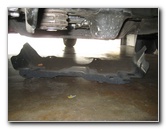
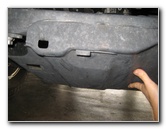
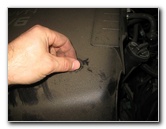
| If the truck has
been driven recently, I'd recommend allowing it to cool for an hour or two. Park the vehicle on a level surface, turn off the engine and engage the emergency / parking brake. It would also be a good idea to chock the front wheels to prevent it from moving while you are replacing the belt. The easiest way to access most of the pulleys and also release the belt tensioner is from below the engine. Slide under the engine bay and locate the four bolts that hold the metal skid plate (A.K.A. splash shield or under engine cover) in place. There is one bolt at each corner of the skid plate. |
||
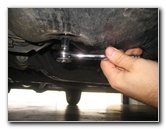
 4th 12mm Bolt |
 Metal Hook - Front of Plate |
 Four 12mm Bolts Removed |
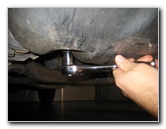
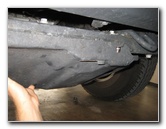
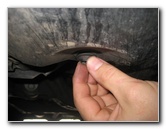
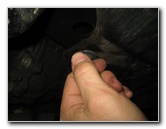
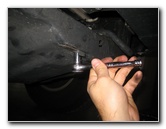
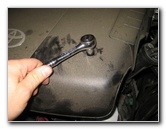
| Loosen the bolts by
turning them counterclockwise with the 12mm socket and 3/8" drive ratcheting
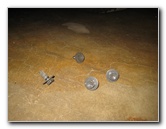
wrench. Hold up the rear edge of the skid plate with one hand while you remove the two back bolts. Set the four bolts aside in a safe place. Lift the front edge of the skid plate and slide it forward to disengage it from the metal hooks. |
||
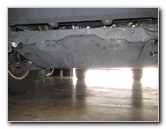
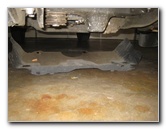 Metal Cover Removed |
 View of Pulleys From Under |
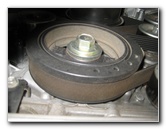 Crankshaft Pulley |
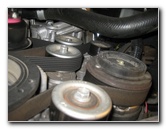
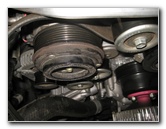
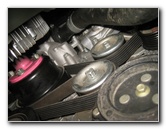
| Slide the under
engine cover back towards the rear of the truck to get it out of the way. I'd recommend you take a few moments to how the old serpentine belt is routed around the various pulleys including the crankshaft, A/C compressor, tensioner, water pump, alternator (generator), power steering pump, idler 1 and idler # 2. A general tip to remember is that the ribbed side of the belt gets wrapped around ribbed pulleys and the smooth side of the pulley goes against smooth pulleys. |
||
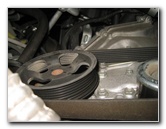
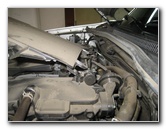
 Power Steering Pump & Idler |
 Belt Routing Diagram |
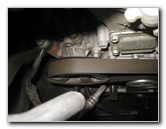
 14mm On Tensioner Pulley |
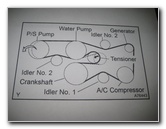
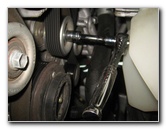
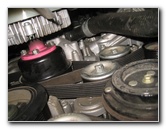
| I included a
picture of the accessory belt routing diagram for the 1GR-FE 4.0L V6 engine. Locate the tensioner pulley just below and to the right of the water pump and just above and to the right of the large crankshaft pulley. Attach a 14mm socket to a 3/8" or 1/2" drive ratcheting wrench. If your tensioner is very firm, you may need a long "cheater" bar to place over the ratcheting wrench for more leverage. |
||
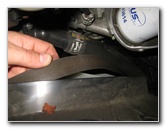
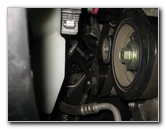
 Turn Counterclockwise |
 Pull Old Belt Off Pulleys |
 10mm Engine Cover Nuts |
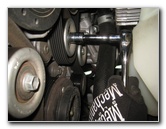
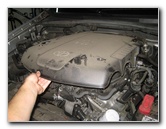
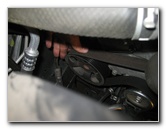
| Rotate the wrench
counterclockwise to move the tensioner arm to the left and release the
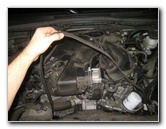
tension from the old belt. Hold the tensioner in the released position with one hand while slipping the old belt off the tensioner pulley and/or one of the other adjacent pulleys. For better access to the top of the engine and some of the pulleys, remove the plastic engine cover. |
||
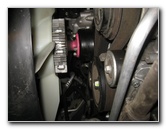
 Loosen Counterclockwise |
 Two 10mm Nuts |
 Lift Front of Engine Cover |
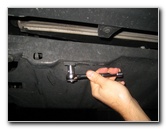
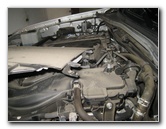
| Loosen the two nuts
that hold the engine cover in place by turning them counterclockwise with a
10mm socket and 1/4" drive ratcheting wrench.
Set the two nuts aside in a safe place. Lift the front edge of the engine cover and then slide it forward to disengage the two "C" shaped sockets on the rear edge from the mounting bar. |
||
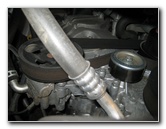
 Pull Sockets Off Bar |
 Route Belt Around Fan |
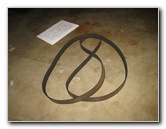 Old Belt Removed |
| Set the plastic
engine cover aside in a safe place. Pull the old belt off all of the pulleys. Route the old belt in front of the fan and around the fan blades. Inspect the old belt for cracks, rips, tears and fraying. If the old belt is in relatively good condition, you could save it in your garage or truck bed storage container for emergency use. I recommend buying the Gates K070834 belt since it has excellent reviews on Amazon. |
||
|
|
||
 Lower In New Belt |
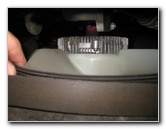 Route New Belt Under Fan |
 Belt Routed Past Fan Blade |
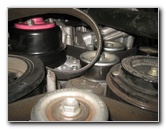
| Check the three
idler pulleys and make sure that they spin freely. If an idler pulley is
difficult to turn, doesn't rotate evenly, wobbles or makes a squeaking
noise, you should consider replacing it. A few compatible idler pulleys with their part numbers are as follows: Gates 36174, ACDelco 36173, Toyota 16604-0P011, Febest 0188-2GRFE and Gates 36173. (Make sure you are buying the correct "upper" or "lower" idler pulley.) If the tensioner assembly was very loose and it was easy to release the tension on the old belt, consider replacing it with a new one. Here are a few compatible replacement tensioner assemblies with their part numbers: Gates 38411, ACDelco 38411 and Continental Elite 49416. Lower the bottom part of the new belt down in front of the engine and around the fan blades. |
||
 Start Routing New Belt |
 Belt Over P/S Pump |
 Water Pump, Tensioner, A/C |
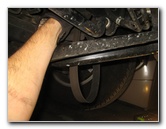
| Remember that the
ribbed side of the belt goes around the ribbed pulleys and the smooth side
of the belt goes against the flat pulleys. Wrap the new belt around the power steering pump pulley, over the idler number two pulley, over the water pump, under the idler pulley, around the alternator, around the air conditioning system compressor pulley, over the lower idler and around the crankshaft pulley. |
||
 Loosen Tensioner - Slip Belt On |
 New Belt Installed |
 Double Check Routing |
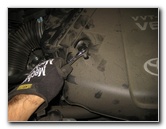
| Hold the new belt
taught near the tensioner pulley with one hand.
Rotate the tensioner pulley in the counterclockwise direction to move it towards the left until you can slip the end of the belt over the pulley. Double check that you have routed the new belt the correct way over the pulleys. |
||
 |
 |
 |
| Make sure that the
grooves on the underside of the new belt are seated properly on each of the
ribbed pulleys. Check that the new belt is tight but loose enough to be turned about 90 degrees. If the new belt seems loose or too tight, you may have routed it the wrong way around the pulleys or the tensioner arm assembly may need to be replaced. Start the engine and listen carefully for any strange sounds that might indicate an improperly routed belt, a loose pulley, a seized pulley or a worn out pulley bearing. |
||
 Under Engine Cover |
 Line Up Skid Plate |
 Re-Attach Two Front Hooks |
| Slide the metal under engine cover forward and re-insert the metal hooks in to the square openings. | ||
 Spin In 12mm Bolts |
 |
 Tighten Clockwise |
| Spin in the two rear 12mm bolts a few turns by hand to prevent them from becoming cross threaded. | ||
 3rd 12mm Bolt |
 4th 12mm Bolt |
 Under Engine Cover Secured |
| Tighten the four
bolts by turning them clockwise with the 12mm socket and ratcheting wrench
until they are snug. Double check that the skid plate bolts are secure. |
||
 Line Up "C" Sockets & Bar |
 Spin On 10mm Nuts |
 Tighten Nuts Clockwise |
| Re-attach the "C"
shaped sockets on the back side of the engine cover to the metal mounting
bar. Lower the front of the engine cover in to place. Spin on the two 10mm nuts and tighten them in the clockwise direction until they are snug. Try to avoid over tightening the two nuts to prevent from cracking the plastic engine cover. For more,
check out my other
2005-2015 Toyota Tacoma DIY Repair & Maintenance Guides. |
||
| If you found this guide to be helpful,
please consider making a small donation by clicking on the PayPal.com
"Donate" button located to the right of this paragraph. Thank you!
(Note: I am not a registered charity. Donations are not tax deductible.) |