
VW Tiguan
Engine Air Filter Replacement Guide
How to check or change the 2.0L TSI I4
engine air filter in a 1st generation 2009 to 2017 Volkswagen Tiguan.

By Paul B. Michaels Author & Photographer Auto Mechanic Since 1989 |
||
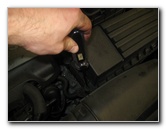
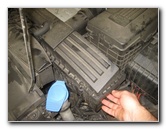
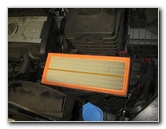
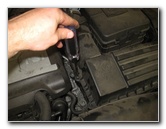
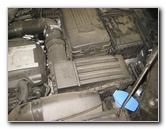 2016 Tiguan Engine Air Box |
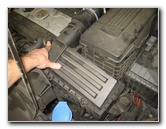
 Loosen Screws |
 Turn Counterclockwise |
| This
automotive maintenance tutorial was specifically written to assist
owners of the first generation (2009, 2010, 2011, 2012, 2013, 2014,
2015, 2016 and 2017) Volkswagen Tiguan SUV in cleaning or changing
the engine air filter element for the 2.0 liter TSI turbocharged
inline four cylinder motor. Owners of other VW or Audi vehicles such as the Jetta, Passat, CC, Atlas, Touareg, Golf, Beetle, A3, S3, RS 3, A4, S4, A5, A6, S6, A7, S7, RS 7, A8, Q3, Q5, TT and Q7 may also find these DIY instructions to be helpful.' A few compatible replacement engine air filters with their part numbers are as follows: Mann Filter C35154, EPAuto GP154, K&N 33-2865, Fram CA9711, ECOGARD XA4622, AEM 28-20865, Wix 49020, Volkswagen 1K0-129-620-D, MAHLE Original LX 1211, POTAUTO MAP 6048, Purolator A15622 and Hastings AF1417. The only needed to access and replace the engine air filter element is a Torx T-25 star bit screwdriver. |
||
|
|
||
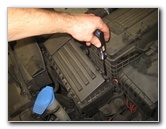
 Front Middle Screw |
 Front Left Screw |
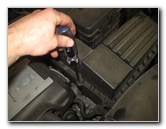 Left Edge Screw |
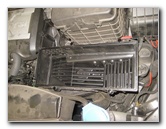
| The first two steps
are to open the hood and then move to the right (driver) side of the engine
bay. The rectangular shaped black plastic engine air filter box is located in front of the 12V automotive battery box and just behind the blue windshield washer fluid filler cap and driver side headlight assembly. There are eight Torx T-25 screws holding the top half of the air box assembly in place to the bottom half. Loosen the 8 screws by turning them in the counterclockwise direction. |
||
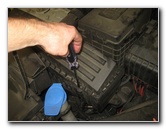
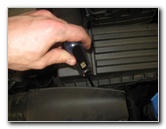
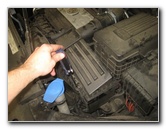
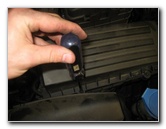
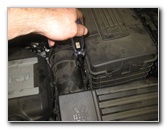
 Screw Near Intake Tube |
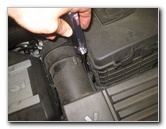 Right Side Intake Tube |
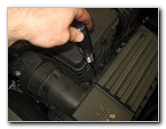 Rear Edge - 8 Screws |
| The screws are
"captured" and will remain attached to the air box cover. So there is no risk of loosening too much and having them fall down into the engine bay. Be sure to also loosen the two screws that are located on the sides of the air intake hose in between the engine cover and the 12V battery box. |
||
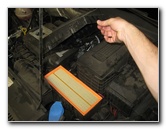
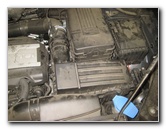
 Lift Off Air Box Cover |
 Old Filter Exposed |
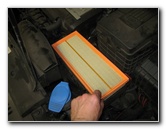 Lift Out Old Air Filter |
| Gently lift the
cover up and off the bottom half of the air box. Once the cover is out of the way, you'll be able to access the old engine air filter. Pull the old filter straight out of the bottom half of the air box. |
||
|
|
||
 Old Air Filter Removed |
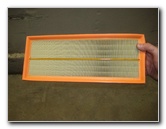
 Inspect Both Sides |
 Bottom Half of Air Box |
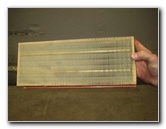
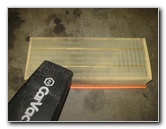
| Inspect both sides
of the old filter. If the old filter is dark grey or black and clogged with dirt, dust, sand, leaves, insects, soot, pollen, hair, twigs and other debris, it should be replaced with a new element. I recommend buying the Mann Filter C35154 since it has excellent reviews on Amazon. (The Mann-Filter is also known as part number C 35 154/1 or 1K0129620E. Their is also a version of the filter that does not include the white foam pre-filter which is part number C 35 154 or 1K0129620D.) If your vacuum cleaner has a hose with a crevice attachment, clean out any sand or other debris in the bottom half of the air box. |
||
 Clean With Vacuum |
 Lower In New Filter |
 Rubber Seal Up |
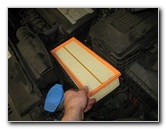
| If the old filter
looks relatively clean, just tap out the large debris and remove any fine
dust with a vacuum cleaner. Lower the new filter into the air box with the pleats facing down and the rubber seal facing up towards you. |
||
 Lower Air Box Cover |
 Tighten 8 Torx Screws |
 Tighten Clockwise |
| Lower the cover
back into place over the filter and the lower part of the air box. Tighten the eight screws in the clockwise direction with the Torx T25 screwdriver until they are snug. Try to avoid over tightening the screws to prevent from cracking the plastic air box. |
||
 |
 |
 Engine Air Filter Replaced |
| Double check that
the top half of the air box is flush against the lower half with no part of
the new filter's rubber seal visible at the edges.
Be sure to record the engine air filter change in your SUV's service records. For more, please check out my other
2009-2017 VW Tiguan DIY Repair & Maintenance Guides. |
||
| If you found this guide to be helpful,
please consider making a small donation by clicking on the PayPal.com
"Donate" button located to the right of this paragraph. Thank you!
(Note: I am not a registered charity. Donations are not tax deductible.) |