
Volvo XC60
Rear Fog Light Bulb Replacement Guide
How to change a burnt out rear fog light
bulb in the back bumper cover of a 1st generation 2010 to 2017 Volvo XC60.

By Paul B. Michaels Author & Photographer Auto Mechanic Since 1989 |
||
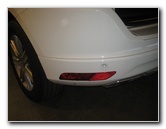 2017 XC60 Rear Fog Light |
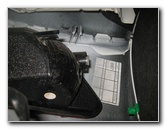
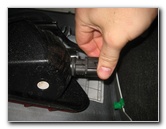
 Look Under Bumper Cover |
|
| This
automotive maintenance tutorial was specifically written to assist
owners of the first generation (2010, 2011, 2012, 2013, 2014, 2015,
2016 and 2017) Volvo XC60 SUV in changing a burnt out rear Owners of other Volvo vehicles such as the XC90, XC70, S90, S80, S60, S40, C30, C70, V90, V70, V60 and V40 may also find these DIY instructions to be helpful. The compatible replacement bayonet style halogen light bulb part number is H21W, Osram Sylvania # 64136 or VW / Audi # N10445602. No tools are needed to access and replace the rear fog light bulb. |
||
|
|
||
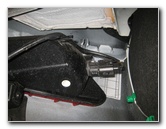
 1/4 Turn Counterclockwise |
 Push Down & 1/4 Turn CC |
|
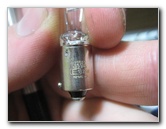
| Rotate the black
plastic bulb socket 1/4 turn counterclockwise before pulling it straight out
of the housing. Push the old bulb down in to the socket and rotate it 1/4 turn counterclockwise before pulling it straight out. |
||
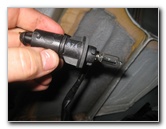
 Old Bulb Removed |
 H21W (64136) Bulb |
|
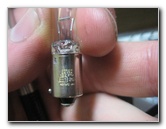
| The OEM rear fog
light bulb in this 2017 Volvo XC60 was the Osram Sylvania
64136.
Any compatible H21W bayonet style halogen bulb or the Volkswagen / Audi # N10445602 bulb will also work. (Note - Only the driver side rear fog light bulb can be turned on and should only be used during heavy fog or rain to increase the SUV's visibility to other drivers. The passenger side rear fog light is normally inactive except during an emergency or panic braking situation when both rear fog lights will illuminate to act as an extra set of very bright "Adaptive" brake lights.) If you would like to have a brighter rear fog light, there are H21W LED bulbs available. |
||
|
|
||
 Push Down & 1/4 Turn C |
 Fog Light Bulb Housing |
|
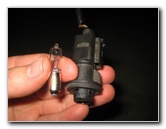
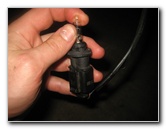
| Either handle the
new bulb while wearing gloves, hold it with a clean paper towel or be
prepared to clean it later. Push the new halogen bulb in to the socket and rotate it 1/4 turn clockwise to secure it in place. Clean the new bulb with an alcohol wipe or a paper towel with some rubbing alcohol. Any oil from your fingers left on the new bulb could shorten its useful life by causing hot spots that may lead to the filament overheating or the glass shattering. |
||
 1/4 Turn Clockwise - Lock |
 Rear Fog Bulb Installed |
|
| Re-insert the bulb
socket in to the housing and rotate it 1/4 turn clockwise to secure it in
place. To test the new bulb, turn on the headlights and activate the rear fog light switch. For more,
check out all of my
2010-2017
Volvo XC60 DIY Repair & Maintenance Guides. |
||
| If you found this guide to be helpful,
please consider making a small donation by clicking on the PayPal.com
"Donate" button located to the right of this paragraph. Thank you!
(Note: I am not a registered charity. Donations are not tax deductible.) |