
Toyota
Corolla Front Wheel Bearings Replacement Guide
How to replace the "press out/in" front wheel
bearings on a 9th generation 2003 to 2008 Toyota Corolla with pictures.
 Previous |
 Home |
Page 2 of 2
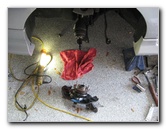
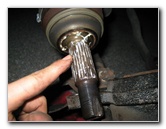
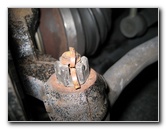
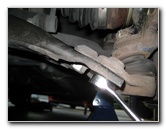
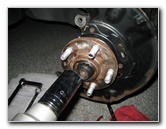
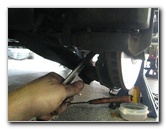
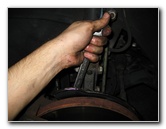
 Pull Out Drive Axle |
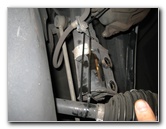 Zip Tie Support Drive Axle |
 Steering Knuckle Removed |
| While tapping on
the drive axle, pull on the steering knuckle to separate it from the hub.
Make sure that the drive axle is supported by a few zip ties to prevent it from crashing down to the ground when you pull off the steering knuckle. |
||
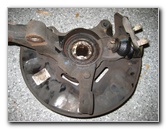
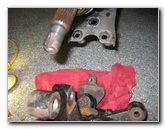
 Take To Machine Shop |
 Precision 510070 Bearings |
 New Bearing Pressed In |
| We took the two
steering knuckles to a local machine shop to have the old bearings pressed
out and also have the new Precision 510070 bearings pressed in.
They charged me $46 for each bearing or a total of $92 for both. You could press out/in the bearings yourself if you invest in a shop press. Most people recommend that you'll need at least a 12 ton press, but I have read about other people being able to complete the job with a 6 ton press. |
||
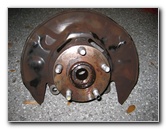
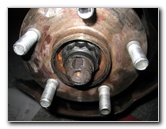
 Ready To Re-Install Knuckle |
 Drive Axle Splines & Control Arm |
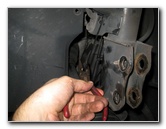
 Put On Lower Control Arm |
| The first step once
we got the steering knuckles back to the garage was to apply some
white
lithium grease to the drive axle splines to help it slide into the wheel
hub.
Do not get any grease on the threads for the drive axle nut. Then insert the bolts on the ball joint bracket down into the holes in the lower control arm. Thread on the two nuts and insert the other bolt. |
||
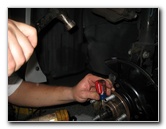
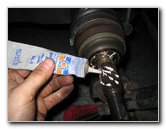 White Lithium Grease |
 Lubricate Axle Splines |
 Cut Zip Tie - Hold Axle |
| Cut the zip tie
that is supporting the drive axle and gently lower it down into the center
of the wheel hub. Try to avoid hitting the new wheel bearing when you slide the drive axle splines into the steering knuckle. |
||
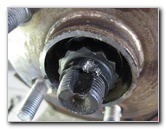
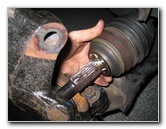 Guide Axle Into Hub |
 Fully Seat Axle In Hub |
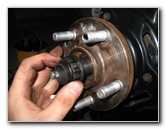 Replace 30mm Axle Nut |
| Push the steering
knuckle and the drive axle together to fully seat the splines into the hub
in the center of the new bearing. Replace the drive axle nut and spin it on by hand a few turns to prevent cross threading the nut. |
||
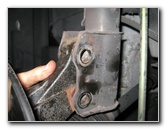 Place Knuckle In Strut Flange |
 Replace 19mm Bolts |
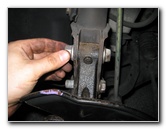 Replace Strut-Knuckle Nuts |
| Place the top of
the steering knuckle back into the strut flange and push through the two
19mm bolts from the rear. Twist on the two 19mm nuts to the bolts to hold the steering knuckle to the strut. |
||
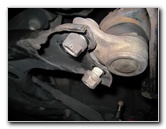
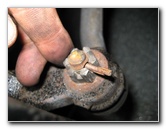
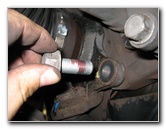
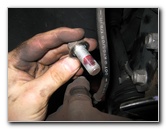
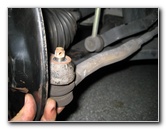 Replace Tie Rod End |
 Replace 17mm Tie Rod Nut |
 Tighten Tie Rod End 36 Ft Lb |
| Turn the steering
wheel inside the car until the tie rod end can easily be re-inserted back
into its mounting hole on the steering knuckle. Twist on the 17mm tie rod end nut and tighten it with a torque wrench to 36 ft lbs. |
||
|
|
||
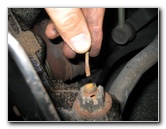 Insert Tie Rod Cotter Pin |
 Tie Rod Cotter Pin Installed |
 Bend Ends of Cotter Pin |
| You may need to
turn the tie rod end nut a bit more until the hole in the threaded stud
lines up with one of the openings in the top of the nut in order to insert
the cotter pin. Slide the straightened cotter pin through the nut and the threaded stud. Use a pair of needle nose pliers to bend the top arm of the cotter pin over the nut and the bottom piece down. |
||
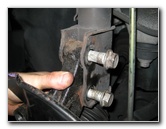
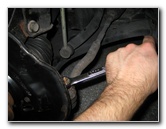
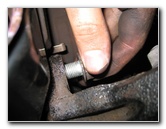
 Tighten Balljoint-Control Arm |
 Torque To 66 Ft Lbs |
 Torque Strut/Knuckle 113 Ft Lb |
| Tighten the two
17mm nuts and the one 17mm stud that connect the ball joint bracket to the
lower control arm with a torque wrench to 66 ft lbs. Tighten the two 19mm strut to steering knuckle bolts/nuts with a torque wrench to 113 lb-ft as shown in the service manual. It helps to have a 19mm wrench on one side of the strut to prevent the bolt from spinning when you use the torque wrench to tighten the nut. |
||
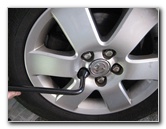
 Tighten Axle Nut To 159 Ft Lb |
 Check With Torque Stick/Wrench |
 Hammer Axle Nut Indent |
| Use the impact
wrench with the 30mm 12 point socket to tighten the axle nut. Then use a
torque stick on the impact wrench to tighten it to about 159 lb-ft.
Alternatively, you could attach the spare wheel, lower the car until the tire makes contact with the ground and then use a torque wrench with a cheater bar (breaker pipe) to torque the axle nut to 159 lb-ft as shown in the shop manual. Once the axle nut has been properly tightened, re-create an indentation in the nut by striking it with a hammer and chisel or flathead screwdriver. Don't worry if the old indentation doesn't line up with the cut out section of the drive axle threads. |
||
 Axle Nut Indent Created |
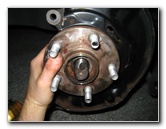
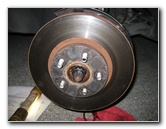 Replace Front Brake Rotor |
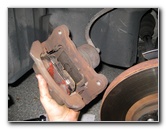 Replace Caliper Bracket |
| Replace the front
brake rotor on the wheel hub and thread on a lug nut to temporarily hold it
in place. Replace the brake caliper bracket over the rotor and thread in the top 17mm bolt. (The brake caliper bracket is also referred to as the "caliper torque plate".) |
||
 Replace 17mm Bracket Bolt |
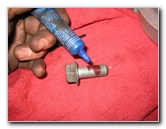 Loctite On Caliper Bracket Bolt |
 Insert Lower Bracket Bolt |
| Apply a small amount of Loctite Red heavy duty threadlocker on the threads of the lower 17mm caliper bracket bolt and insert it into the back of the caliper bracket. | ||
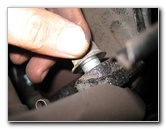
 Tighten Lower Bolt 79 Ft Lbs |
 Loctite On Upper Bracket Bolt |
 Re-Insert Upper Bracket Bolt |
| Tighten the lower
caliper bracket bolt to 79 ft lbs with a torque wrench. Remove the upper caliper bracket bolt, apply some Loctite Threadlocker to the threads and re-insert it back into the caliper bracket. Tighten the upper caliper bracket bolt to 79 ft lbs with a torque wrench. |
||
 Torque Upper Bolt 79 Ft Lbs |
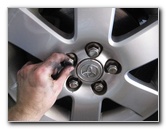 Replace Wheel & Lug Nuts |
 Tighten Lug Nuts 100 Ft Lbs |
| Replace the front
wheel and thread on the five lug nuts by hand to prevent them from becoming
cross threaded. Lower the vehicle from the jack stands using the floor jack until the front tire holds some of the vehicle's weight. Then tighten the lug nuts 1/4 to 1/2 turn past hand tight or about 76 ft lbs of torque. (The service manual for the 2003-2008 Toyota Corolla specifies 76 lb-ft of torque for the wheel lug nuts.) Take the car for a short test drive. Hopefully you'll be able to enjoy a smooth and quiet ride. If you still hear excessive road noise, you may need to replace the tires or get an alignment. If your tires are already wearing poorly such as being scalloped, feathered or cupped you may need to replace suspension components such as the strut, tie rod end, spring, or ball joint. For more, check out my other 2003-2008 Toyota Corolla Repair & Maintenance Guides.
If you have a newer model check out my
2009-2013 Toyota Corolla Repair & Maintenance Guides. |
||
| If you found this guide to be helpful,
please consider making a small donation by clicking on the PayPal.com
"Donate" button located to the right of this paragraph. Thank you!
(Note: I am not a registered charity. Donations are not tax deductible.) |
|
Previous |
Home |