
Nissan Altima
License Plate Light Bulbs Replacement Guide
How to change a burnt out license plate
light bulb in the trunk lid of a 5th generation 2013, 2014 or 2015 Altima.

By Paul B. Michaels Author & Photographer Auto Mechanic Since 1989 |
||
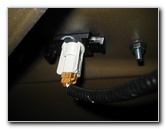
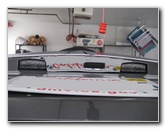 2014 Altima License Plate Lights |
 Left Light Bulb Housing |
 Pry Out Center of Fastener |
| This
automotive maintenance tutorial was specifically written to assist
owners of the fifth generation (2013, 2014, 2015 and probably also
the revised 2016 model year) Nissan Altima sedan in changing a
burnt out license plate light bulb or upgrading both of the bulbs to
brighter LED bulbs. Owners of other Nissan or Infiniti vehicles such as the Versa, Maxima, Juke, Rogue, Murano, Xterra, Pathfinder, Sentra, Cube, Armada, Leaf, Quest, Frontier, 370Z, GT-R, Titan, G25, G37, M35 and M37 may also find these DIY instructions to be helpful. A replacement bulb is part number 2825 or W5W, which is available from various manufacturers such as Sylvania, GE, PIAA and Eiko. You may also be able to use any other miniature wedge base bulbs such as the # 158, 168, 194 or a compatible LED unit. The only tool needed to replace the bulbs is a small flathead screwdriver or a used to pry out the pop rivet fasteners. You could also use a pop rivet removal tool. |
||
|
|
||
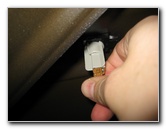
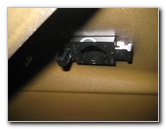
 Remove Fastener |
 Release Other Fasteners |
 |
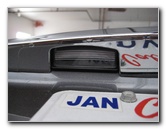
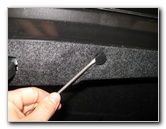
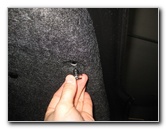
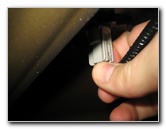
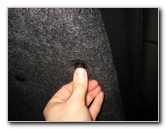
| Open the trunk lid
and locate the black plastic pop rivet fasteners on the carpeted liner. Gently pry out the center part of each pop rivet before removing the entire fastener. |
||
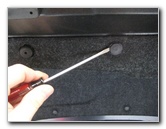
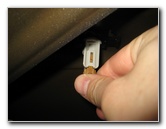
 |
 3 Pop Rivets Removed |
 Pull Back Trunk Lid Liner |
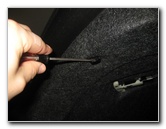
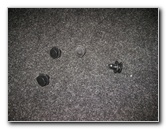
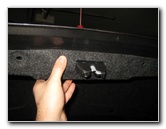
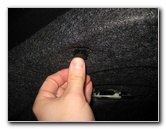
| I only removed
three of the pop rivets to access the license plate light bulb socket. You might choose to remove more of the fasteners on the trunk lid liner for better access. Gently pull back the trunk lid liner to access the socket. |
||
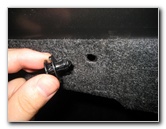
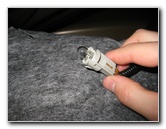
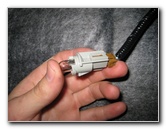
 Bulb Socket |
 1/4 Turn Counterclockwise |
 |
| Rotate the bulb socket 1/4 turn counterclockwise before pulling it straight out of the trunk lid. | ||
|
|
||
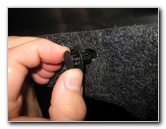
 Remove Bulb Socket |
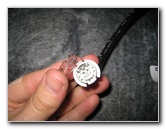 Pull Out Old Bulb |
 Old # W5W Bulb Removed |
| Pull the old bulb
straight out of the socket and push in a new # W5W bulb. You may also be able to use any other miniature wedge base bulbs such as the # 158, 168, 2825, 194 or a compatible LED unit. |
||
 Push In New # W5W Bulb |
 Bulb Housing |
 1/4 Turn Clockwise - Lock |
| Re-insert the socket in to the housing and rotate it 1/4 turn clockwise to secure it in place. | ||
 Replace Carpeted Liner |
 Re-Insert Plastic Fasteners |
 Pop In Center Piece |
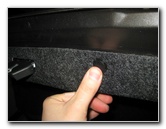
| Push the trunk lid
liner back in to place over the latch mechanism. Re-insert the plastic fasteners and pop in the center part to secure them in place. |
||
 Replace Other Fasteners |
 Trunk Lid Liner Secured |
 Test New License Plate Bulb |
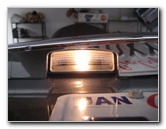
| Test the new
license plate light bulbs by turning on the headlights or by pressing the
"Unlock" button on the key fob. For
more, check out my other
2013-2015 Nissan Altima DIY Repair & Maintenance Guides. |
||
| If you found this guide to be helpful,
please consider making a small donation by clicking on the PayPal.com
"Donate" button located to the right of this paragraph. Thank you!
(Note: I am not a registered charity. Donations are not tax deductible.) |