
Ford Mustang
12V Automotive Battery Replacement Guide
How to change a weak or dead 12 volt car
battery in a 6th generation 2015 to 2022 Ford Mustang.

By Paul B. Michaels Author & Photographer Auto Mechanic Since 1989 |
||
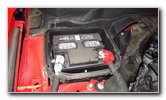
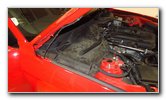
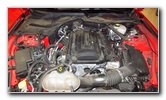 2019 Mustang 2.3L I4 |
 Passenger Side Cowl |
 Remove Plastic Fastener |
|
This automotive
maintenance tutorial was specifically written to assist owners of the S550
sixth generation 2015, 2016, 2017, 2018, 2019, 2020, 2021 and 2022 Ford
Mustang with the EcoBoost 2.3L turbocharged I4 engine in changing a weak or
dead 12V automotive battery. (The procedure should be similar for the 5.0L
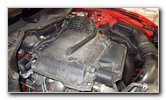
V8, 5.2L V8 and 3.7L V6 engines.) (The 7th generation S650 Ford Mustang is supposed to be released in 2022 as a 2023 model year vehicle.) Owners of other Ford and Lincoln vehicles such as the Fusion, Taurus, Escape, EcoSport, Flex, Expedition, Bronco, Ranger, Transit, F-150, C-Max, Fiesta, Focus, Edge, MKZ, Continental, Corsair, Nautilus, Aviator and Navigator may also find these DIY instructions to be helpful. The OEM battery's "Group Size" is 96R and the part number is Motorcraft BXT-96R-590 (also known as BXT96R590). A few other compatible replacement aftermarket 12V batteries with their part number are as follows: EverStart Plus 96R, DieHard Gold 96R-3, DieHard Platinum 96R-AGM, Champion 96R590CHP and Interstate 96R 852197. The tools and other items needed to complete this procedure include a pop rivet removal tool or a flat head screwdriver, a 10mm socket, an 8mm socket and a 1/4" drive ratchet. If you've had an issue with corrosion (white or blue powder) building up on the terminals, I highly recommend installing some felt anti-corrosion washers over the battery posts or applying some CRC Battery Terminal Protector spray. The first two steps are to open the hood and then move to the left (passenger) side of the engine bay. The 12V battery is located under a black plastic cover behind the passenger side shock tower and in front of the cowl near the windshield. |
||
|
|
||
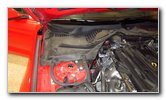
 Plastic Pry Bar Tool |
 Lift Out Base of Fastener |
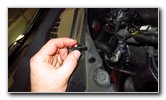 Last Pop Rivet Removed |
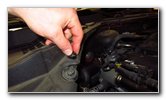
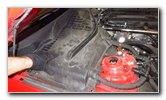
| Locate the small
round black plastic pop rivet fasteners on the cover.
Use a small flathead screwdriver or the plastic pry bar tool to gently lift up the center of the fastener to unlock it. Then use the pop rivet removal tool to pry out the base of the fastener. Set the pop rivets aside in a safe place. (A few of the pop rivets were missing on this car.) |
||
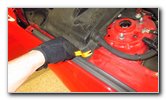
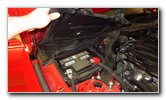 Lift Up Plastic Cover |
 Battery Cover Removed |
 Old Battery Exposed |
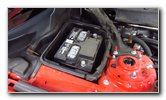
| Lift off the
plastic cover and set it aside in a safe place.
Check the battery terminals and posts for any corrosion (rust). |
||
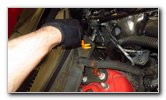
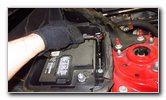
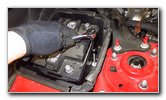
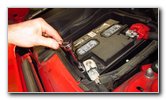 Loosen Negative Terminal |
 Pull Off Negative Terminal |
 Cover & Tuck Away |
| Loosen the nut on
the negative terminal by turning it in the counterclockwise direction with
the 10mm socket and a 1/4" drive ratchet. You don't need to fully remove the nut. Just loosen it about 3 to 4 full turns. Pull the negative terminal off the "-" battery post. Cover the terminal in a small towel and tuck it away behind the fuse box to help avoid accidental electrical contact. |
||
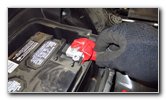
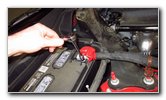 Loosen Positive Terminal |
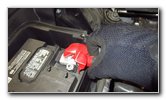 Pull Off "+" Terminal |
 Positive Terminal Removed |
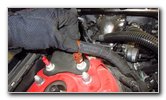
| Loosen the nut on
the positive terminal by turning it in the counterclockwise direction with a
10mm socket and a 1/4" drive ratchet. Pull the positive terminal straight off the "+" battery post. |
||
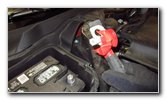
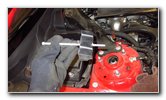
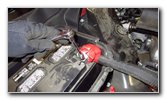
 Pull Off Wire Loom Clip |
 Two Terminals Detached |
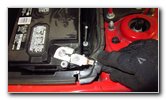
 Loosen Counterclockwise |
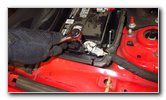
| Pull the dark tan /
orange colored plastic retaining clip attached to the positive cable off the
bolt on the strut tower brace. Locate the small bolt at the front of the battery tray which secures the hold down clamp in place. Loosen the bolt in the counterclockwise direction with the 8mm socket and a 1/4" drive ratchet. |
||
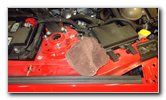
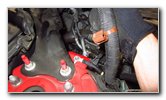
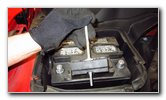
 Plastic Hold Down Clamp |
 Old Battery Removed |
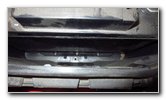
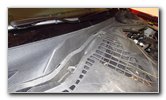
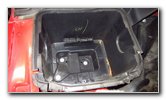 Clean Out Battery Box |
| Lift the bolt and
black plastic hold down block out from the front of the old battery.
Put on some protective rubber gloves or mechanic's gloves and also some protective eyewear. Carefully lift the old battery straight out of the box. Gently lower the old battery down to the floor. Avoid dropping or tipping over the old battery to prevent from having battery acid leak out. Be sure to take the old battery with you to the auto parts stores, Walmart or Costco to avoid having to pay a "core", "disposal" or "recycling" fee. Clean out any debris in the bottom of the heat shield box so that the new battery will rest evenly on the tray. |
||
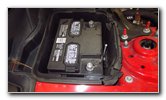
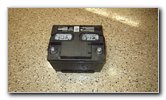
 OEM Part Number |
 Lower In New Battery |
 Locate Bolt Hole - Front |
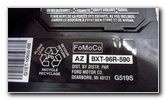
| The OEM battery's
"Group Size" is 96R and the part number is
Motorcraft BXT-96R-590 (also known
as BXT96R590). Carefully lower the new battery down into the box with the positive post located on the right (driver) side and the negative post situated on the left (passenger) side. Slide the new battery back on the tray until the bolt hole for the hold down clamp is visible. |
||
 Lower In Plastic Block |
 Spin In Clockwise |
 Tighten Bolt Clockwise |
| Lower the plastic
hold down clamp down into the front of the new battery. Spin in the bolt a few turns by hand in the clockwise direction to make sure it doesn't become cross threaded. Tighten the bolt for the hold down block by turning it in the clockwise direction with the 8mm socket until it is snug. Check to see if the new battery can be moved, slid or rocked on the tray. If the new battery can be moved, tighten the hold down clamp bolt a few extra turns and check again. I highly recommend either installing some felt anti-corrosion washers over the battery posts or instead spraying them with some CRC Battery Terminal Protector. Either one can be cheap insurance against having to replace the terminals or cables. |
||
 Push On Positive Terminal |
 Tighten Nut Clockwise |
 Push On "-" Terminal |
| First, push the
positive terminal on to the "+" battery post. Tighten the terminal nut in the clockwise direction with the 10mm socket and a 1/4" drive ratchet until it is snug. Try to avoid over tightening the terminal nut to prevent from cracking the battery post which could result in an acid leak. Then lower the negative terminal over the "-" battery post. |
||
 Tighten Nut Clockwise |
 Re-Attach Cable Fastener |
 Replace Cowl Cover |
| Tighten the
negative terminal nut in the clockwise direction with the 10mm socket and a
1/4" drive ratchet until it is snug. Double check that the two terminals are securely attached. Lower the plastic cover over the battery box and line up the fastener holes. |
||
 Line Up Fastener Holes |
 Push In Pop Rivets |
 Battery Change Done! |
| Re-insert the
plastic fasteners and then pop in the center buttons to secure them in
place. Please remember to adjust the time on the clock and program your favorite radio stations before you start driving. Don't forget to write down the battery change in your car's service records. If you'd like to test the alternator, use a digital multimeter tool. If the alternator is working properly and the engine is running, the battery should be charging at a voltage in the range of about 13 to 14 volts. After a long drive and with the engine turned off, the fully charged battery should have a voltage reading of about12.6V. For more,
please check out all of the
2015-2022 Ford Mustang DIY Repair & Maintenance Guides. |
||
| If you found this guide to be helpful,
please consider making a small donation by clicking on the PayPal.com
"Donate" button located to the right of this paragraph. Thank you!
(Note: I am not a registered charity. Donations are not tax deductible.) |