
Chrysler 200
Reverse Tail Light Bulbs Replacement Guide
How to change a burnt out reverse bulb in
the tail lights of a 1st generation 2011-2014 Chrysler 200 with photo
illustrated steps.

By Paul B. Michaels Author & Photographer Auto Mechanic Since 1989 |
||
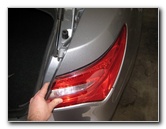
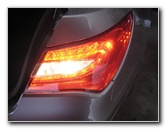
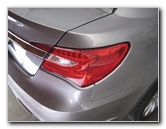 2013 Chrysler 200 Tail Light |
 Incandescent Reverse Light |
 Open Trunk Lid |
| This
automotive maintenance tutorial was specifically written to assist
owners of the first generation (2011, 2012, 2013 & 2014) Chrysler
200 sedan in changing a burnt out reverse bulb in the tail light
assemblies. Owners of other Chrysler, Dodge, Jeep or RAM vehicles such as the Avenger, 300, Town & Country, Challenger, Charger, Dart, Durango, Journey, Grand Caravan, Patriot, Wrangler, Grand Cherokee, Compass, 1500, 2500, 3500, C/V Tradesman and ProMaster may also find these DIY instructions to be helpful. A replacement reverse or "back up" light bulb is part number 921, which is available from manufacturers such as Sylvania, GE, Eiko, Philips and PIAA. If you would like to have brighter reverse lights, install some compatible replacement 921 LED bulbs. The only tool needed to access the bulb is a pair of needle nose pliers (or a flathead screwdriver) to pry out the plastic pop rivet friction fastener holding the carpeted trunk liner in place. |
||
|
|
||
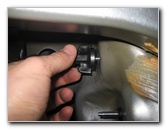
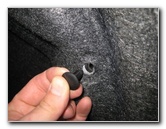
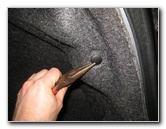 Pull Out Pop Rivet |
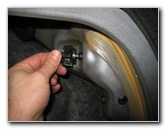
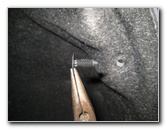 Friction Fastener Removed |
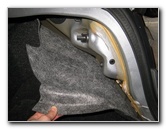 Pull Back Trunk Liner |
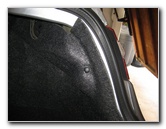
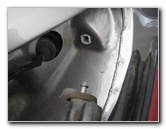
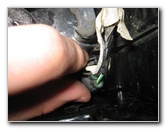
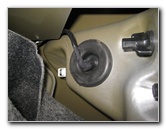
| The first two steps
are to open the trunk and move to the corner of the vehicle with the burnt
out reverse light bulb. Then pull out the black plastic pop rivet friction fastener with either a pair of needle nose pliers, a flathead screwdriver or an automotive panel removal tool. Set the pop rivet aside in a safe place. Gently pull back the carpeted liner away from the rear corner of the trunk to expose the tail light assembly fasteners. |
||
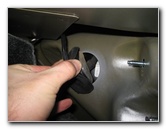
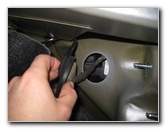
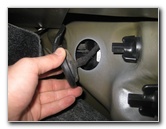
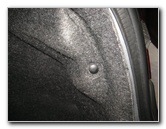
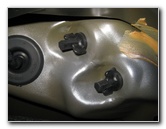 Two Plastic Thumb Nuts |
 Loosen Counterclockwise |
 Remove 2nd Thumb Nut |
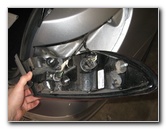
| The tail light
housing is held in place by two large black plastic thumb nuts.
Loosen the thumb nuts by turning them counterclockwise. |
||
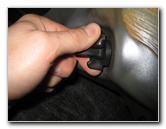
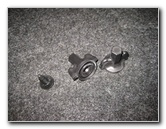 1 Pop Rivet & 2 Thumb Nuts |
 Pull Out Rubber Grommet |
 Optional Step (?) |
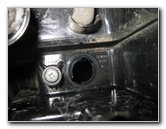
| Remove the two
thumb nuts and set them aside in a safe place. An optional step is to pull out (or push through) the rubber grommet that surrounds the electrical wires for the tail light housing. Dislodging the rubber grommet may make it easier to move the tail light around when you are replacing the bulb. |
||
|
|
||
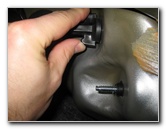
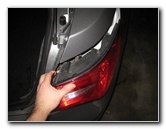 Pull Off Tail Light Housing |
 Metal Peg & Plastic Grommet |
 Turn Over Tail Light |
| Gently pull the
tail light assembly straight off the rear corner of the vehicle.
It is still held in place a metal peg or "spike" on the outer edge. If you have trouble removing the housing, try gently wiggling it while pulling. Turn the housing over and rest it on the bumper to access the reverse bulb socket. |
||
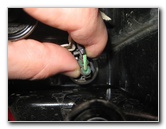 1/4 Turn Counterclockwise |
 Remove Reverse Bulb Socket |
 Pull Out Old # 921 Bulb |
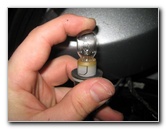
| The small black
plastic reverse bulb socket is located near the middle of the housing closer
to the inner edge. Rotate the bulb socket 1/4 turn counter clockwise and pull it straight out of the assembly. |
||
 Push In New # 921 Bulb |
 Empty Bulb Housing |
 1/4 Turn Clockwise - Lock |
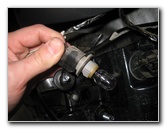
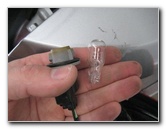
| Pull the old
reverse bulb socket straight out of the socket and push in a new wedge base
# 921 bulb. You could also choose to install brighter 921 LED bulbs. Re-insert the socket in to the housing and rotate it 1/4 turn clockwise to secure it in place. |
||
 Line Up Screws & Peg |
 Push On Tail Light Housing |
 Spin On Plastic Thumb Nuts |
| Line up the screw
ends and the metal peg or "spike" on the rear edge of the housing with their
corresponding holes on the back of the vehicle. Push the tail light back in to place. |
||
 Tighten Clockwise |
 Re-Insert Rubber Grommet |
 |
| Spin on the two
large thumb nuts by hand in the clockwise direction until they are snug. Do not over tighten the thumb nuts to prevent from cracking the plastic tail light assembly. If you removed the rubber grommet, push it back in to place. |
||
 Replace Trunk Carpet Liner |
 Push In Pop Rivet Fastener |
 Test New Reverse Light Bulb |
| Push the trunk
liner back in to place and re-insert the plastic pop rivet fastener to
secure it. Test the new light bulb by having someone turn the ignition to the "On" position, but do not start the engine, step on the brake pedal and place the transmission in reverse. For more, check out my other
Chrysler 200 DIY Maintenance & Repair Guides. |
||
| If you found this guide to be helpful,
please consider making a small donation by clicking on the PayPal.com
"Donate" button located to the right of this paragraph. Thank you!
(Note: I am not a registered charity. Donations are not tax deductible.) |