
Pontiac Grand Prix
Brake Line Bleeding Guide
Pictures
illustrated instructions on how to flush or "bleed" the brake fluid on a
1997-2003 GM Pontiac Grand Prix.

|
This guide was specifically written to assist owners of the 6th generation (1997, 1998, 1999, 2000, 2001, 2002 and 2003) GM Pontiac Grand Prix SE / GT / GTP in bleeding the brake lines. Owners of other General Motors automobiles may also find these instructions useful since the procedure is very similar. Some of the other GM vehicles with a similar brake fluid flush process include the Pontiac Grand Am, Trans-Am, Torrent, Aztek, Sunfire, Vibe, Bonneville, Montana, G5, G6, G8, Solstice, Firebird, GTO, Chevrolet Camaro, Corvette, Cobalt, Malibu, Impala, Saturn Sky, Ion, Astra, Aura, Vue, Buick LeSabre, Regal, Grand National, Lucerne, Centruy, Park Avenue, Cadillac Catera, DeVille, Eldorado, Seville, Escalade, STS, DTS, and CTS. |
||
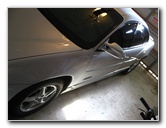 2001 Pontiac Grand Prix |
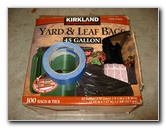 Painter's Tape, Garbage Bags |
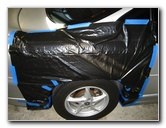 Paint Protected With Plastic |
| My 2001
Pontiac Grand Prix GTP is about to hit the 91,000 miles mark on the
odometer. The rear brake pads are the originals and the front brake
pads were replaced during the 60,000 mile service. Recently I had noticed some grinding noises and brake fade (soft brake pedal) during stop and go traffic. I decided to replace the brake pads on all four wheels and bleed the brake lines. This guide is only for bleeding the brake lines, if you need to change the pads, visit the Front Brake Pads Replacement Guide or the Rear Brake Pads Replacement Guide. Since DOT 3 brake fluid can easily eat automotive paint, my first step was to protect the bodywork with large plastic garbage bags attached with painter's tape. I've been painstakingly washing and waxing my car for 8 years. I didn't want to take any chances with having brake fluid damage the paint. Update - I recently purchased the Allstar Performance Bleeder Bottle for completing this procedure without the need for an assistant. It has a one way valve and a holder magnet that makes bleeding your brake lines a quick and easy one man job. |
||
|
|
||
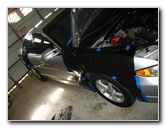 Bodywork Covered |
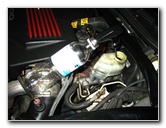
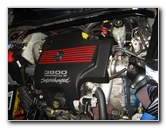 GM 3800 Series II Engine |
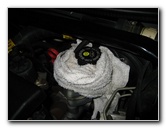
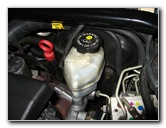 Master Brake Cylinder |
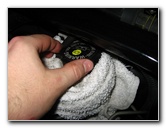
| To flush the brake
lines with fresh new brake fluid, we'll be pumping it out at each wheel and
constantly refilling the master brake cylinder.
So it's makes sense to first remove as much of the polluted black fluid from the master reservoir as possible before beginning. |
||
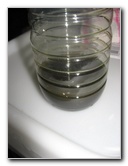
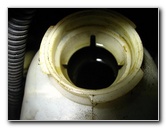 Old Dirty Black Brake Fluid |
 Spray Pump & Bottle |
 Pumping Out Old Fluid |
| To remove the old
fluid from the master brake cylinder, I used a sprayer bottle pump and a
plastic water bottle.
You could also go into the kitchen and borrow a turkey baster (but don't ever use it for food preparation again). |
||
 Ounces of Old Fluid |
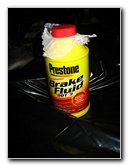 New DOT 3 Brake Fluid |
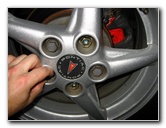
 Removing Lug Nut Caps |
| It is recommended
that you begin bleeding the brakes lines at the wheel farthest from the
master brake cylinder and then working your way towards the brake cylinder.
On the 1997-2003 Grand Prix, that would be rear passenger wheel first, then the driver side rear wheel, passenger side front wheel and finally the driver side front wheel. I had already completed replacing the rear brake pads so I refilled the master brake cylinder up to the "MAX" line with fresh DOT 3 fluid. You can use either DOT 3 or DOT 4 fluid which are both glycol based. Do not use DOT 5 brake fluid, which is silicon based and is not compatible with the 97-03 Grand Prix braking system. |
||
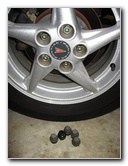 Lug Nut Caps Removed |
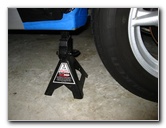
 Loosening Lug Nuts (19mm) |
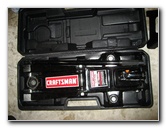 Craftsman Floor Jack |
| Next I removed the
plastic lug nut caps with a 19mm socket and loosened the lug nuts with the
lug wrench.
Then I raised the side of the car with the floor jack and replaced it with a jack stand. |
||
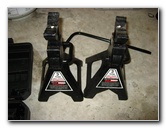 Craftsman Jack Stands |
 Lifting Side of Car |
 Jack Stand Supporting Car |
 Spinning Off Lug Nuts |
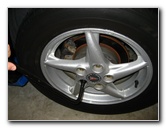
 Lug Nuts Removed |
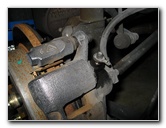
 Wheel Removed, Hub & Rotor |
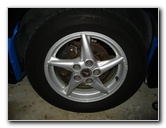
| The lug nuts can be quickly spun off with a 19mm socket and then the wheel can be removed to reveal the wheel hub, brake rotor and brake caliper. | ||
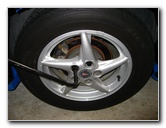
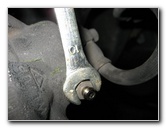
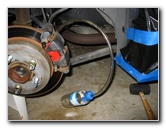
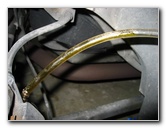
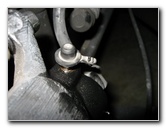
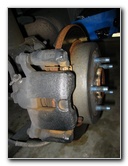 Brake Caliper |
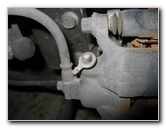 Brake Line & Bleeder Nipple |
 Bleeder Valve Rubber Cover |
| The brake line bleeder valve is located on the rear of the brake caliper. It is covered by a small rubber cap. | ||
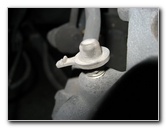
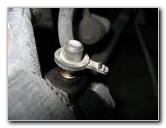
 Rubber Cover Removed |
 Towel Around Brake Cylinder |
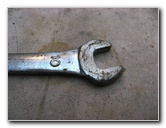
 Loosening Bleeder Valve 10mm |
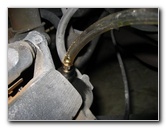
| Before you bring
out your assistant who will be pumping the brake pedal, you should test the
bleeder valves to make sure they can be opened.
I had some trouble at first getting them to turn. I used a rubber mallet to tap on the caliper and lightly tap on the bleeder screw. Then I used a ratcheting wrench and a 10 mm socket to crack open the valves. |
||
 |
 |
 |
| Once I verified that the bleeder valves at each rear brake caliper could be easily opened, I called out my assistant to the garage. | ||
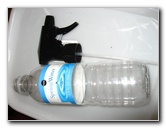
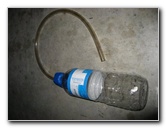 Plastic Tubing & Bottle |
 10 MM Wrench |
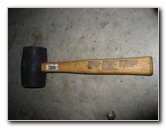 Rubber Mallet |
| To successfully and safely bleed the brake lines, you'll need a large bottle of new DOT 3 or 4 brake fluid, a 10mm wrench, some plastic tubing and a catch container for the old brake fluid such as a plastic bottle. | ||
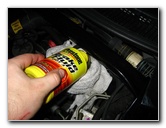
 Adding Fresh Brake Fluid |
 Cap Left Unscrewed |
 Assistant Pumping Brake Pedal |
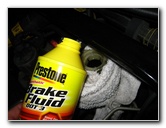
| I had my assistant
sit in the driver's seat and put her foot on the brake pedal.
Then I topped off the master brake cylinder reservoir with new brake fluid. I left the master cylinder cap unscrewed so that the new fluid could easily flow from the master cylinder to the bleeder valves. If you screw the cap on, a vacuum will form in the brake system and air could be sucked in from the bleeder screws. We'll also be constantly refilling the master cylinder with more brake fluid so it's just easier to leave it unscrewed. |
||
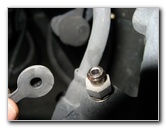
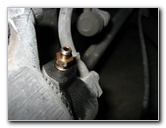
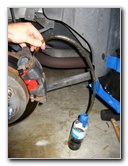
 Catch Container On Bleeder |
 |
 Old Fluid Going Through Tube |
| I asked my
assistant to pump the brake pedal several times until it felt firm.
Then with the plastic tube securely on the bleeder valve's opening, I cracked open the valve about a quarter turn. As old brake fluid rushed out of the valve and into the tube, my assistant pressed on the brake pedal until it sunk almost down to the floor. I asked her to only press the pedal about 2/3 to 3/4 down to the floor to prevent the master cylinder from being damaged by bottoming out or coming in contact with accumulated sediment. One way to prevent the brake pedal from bottoming out is to place a small block of wood between the pedal and the floor mat. |
||
 |
 Pumping Old Fluid Out |
 Adding More Brake Fluid |
| It's important that
the person assisting does not release the brake pedal until the bleeder
screw has been closed.
If the pedal is raised with the bleeder screw still open, old fluid and possibly air will be sucked back into the system negating the whole purpose of the procedure. When the pedal would reach the floor, I had my assistant call out "floor" and then I would say "closed" to indicate that it was safe to slowly release the brake pedal. The farther you turn open the bleeder screw, the faster the fluid leaves the bleeder nipple. Eventually you'll get into a rhythm where the assistant pushes the pedal to the floor just as you're closing the bleeder valve. Then you can reset and repeat the action. Don't forget to check the master brake cylinder often and refill it with new brake fluid to the "MAX" line. It's very important that the level in the cylinder does not drop so low that air is introduced into the system, which again would defeat the entire point of bleeding the brake lines in the first place. |
||
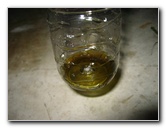
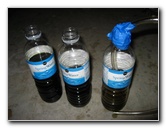 Three Bottles of Black Fluid |
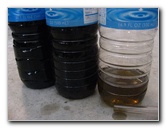 Third Bottle Much Clearer |
 Tighten Bleeder, Replace Cap |
| We kept on
repeating the steps until the brake fluid coming out of the bleeder valve
looked relatively clear.
As you can see above, the first bottle is dark black, the second bottle is slightly lighter and the fluid in the third bottle is much clearer. It's obvious that the automotive shop that performed my 60,000 mile service just replaced the front pads and did not flush the brake fluid. I used so much new brake fluid flushing the lines that I had to go buy another bottle to top off the master brake cylinder when I was finished. As I completed each caliper, I tightened down the bleeder screw with a 10mm socket and ratcheting wrench and replaced the rubber cap. Then I replaced the wheel, tightened the lug nuts and put the plastic lug nut caps back on. |
||
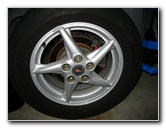 Replace Wheel & Tighten Lugs |
 Replace Lug Nut Caps |
 Brake Bleeding Complete |
| Before I took the
car for a test drive, I topped off the
DOT 3 brake fluid in the master cylinder to
the "MAX" line and pumped the brake pedal a few times until it was firm.
I broke in the new brake pads with about 10 near-stops from 45-35 mph down to 5-15 mph. The brakes felt great with no apparent fading (soft pedal) even after the last near stop. If you're brake pedal feels spongy, springy or soft after bleeding the brake lines, you may need to repeat the process to remove any trapped air bubbles or contaminated brake fluid. Be sure to record the brake fluid change in your vehicle's service records. For more, visit the following links: Grand Prix Front Brake Pads Replacement Guide, Pontiac Grand Prix Engine Oil Change, Grand Prix Power Steering Fluid Maintenance Guide, GM Power Window Motor & Regulator Replacement Guide, Grand Prix "TCS OFF" SES & ABS Warning Light Troubleshooting Guide, GM 3800 Series II Engine PCV Valve Replacement Guide, Pontiac Grand Prix Alternator Replacement Guide, GM Wheel Bearing Hub Assembly Replacement Guide, Eaton M90 Supercharger Oil Change Guide, and the K&N Air Filter Cleaning Guide.
For more, check out all of my
Pontiac Grand Prix DIY Repair & Maintenance Guides. |
||
| If you found this guide to be helpful,
please consider making a small donation by clicking on the PayPal.com
"Donate" button located to the right of this paragraph. Thank you!
(Note: I am not a registered charity. Donations are not tax deductible.) |