
Pontiac Grand Prix Power Window Motor & Regulator Replacement Guide
Pictures & Instructions for replacing a GM power window motor and regulator in a Pontiac Grand Prix 2nd Gen. W-Body..
|
Main Menu Home Digital Cameras Misc. Pictures Articles My Blog |
 First |
 Previous |
 Home |
 Next |
 Last |
Page 2 of 4
 |
 |
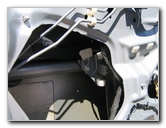
The two pictures above are just more shots of me removing the clear plastic from the Grand Prix metal door frame. Make sure you wear an old T shirt that you don't care about because the black tar adhesive will stain your shirt. Some of the members of the Buick Regal and Chevy Impala message forums have informed me that I didn't have to make a cut into the door's plastic sheet covering. I guess since I spent so much time trying to get the frozen power window down, I was looking to take shortcuts. |
|
|
|
|
 |
 |
|
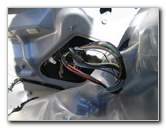
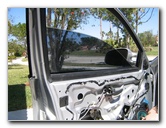
You'll probably be able to remove the wire harnesses by pulling them through the hole in the plastic, but I found it easier just to cut a little exit route out the side of the plastic. In the picture on the right you'll see the window motor has been unbolted, pulled out and taken apart. All the bolts on the regulator and motor are 10mm. |
|
 |
 |
|
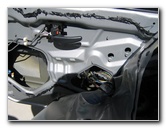
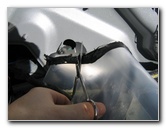
My window was jammed in the track and it was impossible to move. I unbolted the regulator and cut the metal wires that move the window up and down. After fiddling with it for a while and tapping on the track I was able to slide the window down. Once the window was in the halfway down position I could see the two bolts on the metal and plastic piece that holds the glass to the regulator. Getting the window to slide down was the hardest part of this whole process for me so don't despair. Apparently GM doesn't grease the tracks so I had to cut the metal guide wires, play with the regulator, and gently push down on the window to finally get it loose and access the last two 10mm bolts. |
|
 |
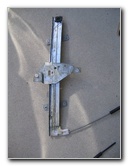 OEM Grand Prix Window Regulator |
|
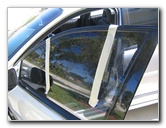
Once the old regulator and window motor are out of the car, you'll need to secure the window in the completely up position. I used some regular masking tape but I've read that painter's tape would be better. I didn't notice any adhesive residue but a little Goo Gone would take care of that in a jiffy anyway. Now would be a good time to put some extra lubrication on the tracks of the new part. The consensus seems to be that
white lithium grease is the best option for this application. |
|
|
|
|
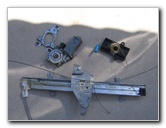 OEM Grand Prix Window Motor |
 |
|
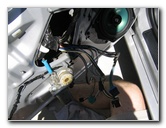
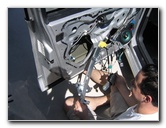
The five year old Mexican made parts can be seen in the picture on the left, while the picture on the right shows my brother inserting the new equipment. First the motor goes in and then the regulator. We loosely threaded the 4 10mm bolts to hold the regulator up. Then we attached the power & control connector to the motor before attaching it to the frame using the 3 slightly longer 10mm bolts. Once you have all 7 bolts loosely threaded in you can tighten them up and remove the tape from the window. Gently lower the window down until the two holes on the window bracket line up with the bolt holes on the regulator. My aftermarket power window motor & regulator combo came in the correct position for installation from the factory. The large hole in the metal frame gives you easy access to the window bolts when the window and regulator are in the halfway down position. |
|
|
|
|
Main Menu Home My Digital Cameras Misc. Pictures Articles My Blog
|
First |
Previous |
Home |
Next |
Last |