
Mitsubishi
Lancer Key Fob Battery Replacement Guide
How to change the battery in the key fob
remote control of an 8th generation 2008-2015 Mitsubishi Lancer sedan.

By Paul B. Michaels Author & Photographer Auto Mechanic Since 1989 |
||
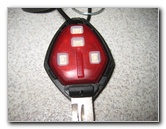
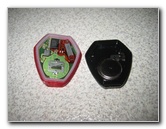
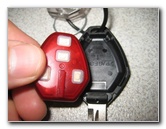
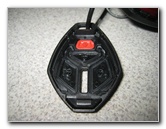
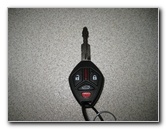 2015 Lancer Key Fob |
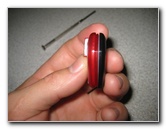
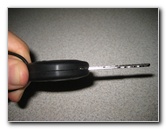
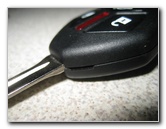 Notch Near Unlock Button |
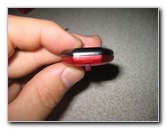
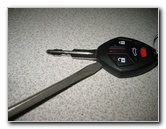 Pry Apart Two Halves |
| This
automotive maintenance tutorial was specifically written to assist
owners of the eighth generation (2008, 2009, 2010, 2011, 2012, 2013,
2014 & 2015) Mitsubishi Lancer in changing the battery in the key
fob remote control for the keyless entry system. Owners of other Mitsubishi vehicles such as the Mirage, Lancer Evolution ("Evo"), Outlander, 3000GT, Diamante, Eclipse, Endeavor, Galant, Montero, ASX, Triton L200 and Raider may also find these DIY instructions to be helpful. A replacement coin cell (A.K.A. "button" or "watch") battery is part number CR1620 which is available from various manufacturers such as Panasonic, Energizer, Duracell, GE, Maxell and Sony. The only tool needed to replace the battery is a flathead screwdriver used to pry apart the two halves of the key fob. |
||
|
|
||
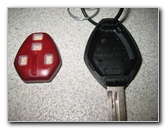
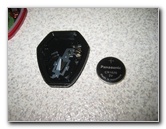
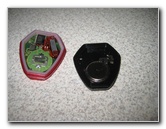
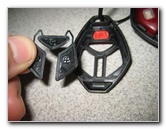
 Front Cover Removed |
 Key Fob Top Cover |
 Remote Control Unit |
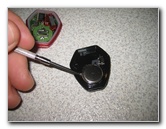
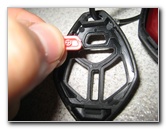
| To prevent from
scratching the plastic surfaces, you may choose to cover the tip of your
screwdriver with a thin micro fiber cloth. Insert the blade of the flathead screwdriver in to the small notch at the top left area of the fob near the "Unlock" button and next to the metal ignition key. Pry apart the top cover of the key fob and set it aside in a safe place. Remove the the plastic pieces for the "Unlock", "Lock", "Open Trunk" and "Panic" buttons and set them aside in a safe place. |
||
 Remove Remote Unit |
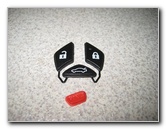 Plastic Buttons |
 Pry Open Remote Unit |
| Pull the remote
control unit out of the rear cover of the key fob. Gently pry apart the two halves of the remote control unit. |
||
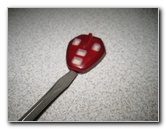
 Remote Unit Separated |
 Pry Out Old Battery |
 Old Battery Removed |
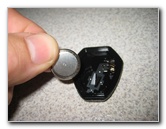
| Carefully pry out
the old battery from its socket in the back cover of the remote control
unit. Try to avoid damaging the metal electrical contacts if you use the flathead screwdriver to remove the old battery. |
||
|
|
||
 Panasonic CR1620 3V |
 Push In New CR1620 |
 "+" Side Facing Down |
| Insert a new # CR1620 3 volt coin cell battery in to the holder with the "+" positive side facing down and the "-" side facing up towards you. | ||
 Snap Together Remote Unit |
 Flush Together |
 Re-Insert Remote Unit |
| Line up the two
halves of the remote control unit and gently snap them together. Re-insert the remote control unit in to the rear cover of the fob attached to the metal ignition key. |
||
 Re-Insert Panic Button |
 Re-Insert Lock / Unlock Buttons |
 Plastic Button Re-Installed |
| Re-insert the plastic "Panic" button and the "Lock", "Unlock" and "Trunk Open" buttons in to the front cover of the fob. | ||
 Snap Together Two Halves |
 Two Halves Flush Together |
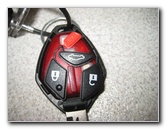
 Test New Key Fob Battery |
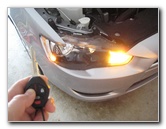
| Line up the two
halves of the key fob and gently pop them back together. Check that the front and back parts of the key fob are flush together at every edge. To test the new battery, stand near your Lancer and press the "Unlock" or "Lock" buttons. If the new battery is working properly, you should see the parking lights flash and also hear the door locks opening or closing. For more, check out my other
2008-2015 Mitsubishi Lancer DIY Repair & Maintenance Guides. |
||
| If you found this guide to be helpful,
please consider making a small donation by clicking on the PayPal.com
"Donate" button located to the right of this paragraph. Thank you!
(Note: I am not a registered charity. Donations are not tax deductible.) |