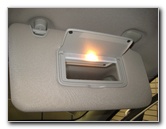
The best place to start when troubleshooting any electrical problem with your second generation (2014, 2015, 2016, 2017 and 2018) Nissan Rogue SUV is to check for a blown electrical fuse or a faulty relay. Take a look at my DIY instructions for the procedure by clicking on the text link or thumbnail image below.
2014-2018 Nissan Rogue Headlight Bulbs Replacement Guide – Low Beam, High Beam, Front Turn Signal & Side Marker (Parking) Lights
The headlight housings of a 2nd generation (2014, 2015, 2016, 2017 and 2018) Nissan Rogue SUV contain the low beam, high beam, front turn signal and side marker (parking) light bulbs. Check out my DIY tutorial for changing a burnt out light bulb (with the compatible replacement part numbers) by clicking on the text link or thumbnail image below.
2014-2018 Nissan Rogue Engine Air Filter Replacement Guide
The engine air filter element for the QR25DE 2.5 liter inline four cylinder motor in a 2014, 2015, 2016, 2017 and 2018 Nissan Rogue should be cleaned at every oil change and replaced every 2 to 3 years. Check out my DIY tutorial for the procedure (with the compatible replacement part numbers) by clicking on the text link or thumbnail picture below.
2014-2018 Nissan Rogue License Plate Light Bulbs Replacement Guide
If you need to change a burnt out license plate light bulb in the tailgate door of your second generation 2014, 2015, 2016, 2017 and 2018 Nissan Rogue SUV (or you’d like to upgrade them both to brighter LED bulbs), check out my DIY tutorial for the procedure (with the compatible replacement part numbers) by clicking on the text link or the thumbnail image below.
2014-2018 Nissan Rogue License Plate Light Bulbs Replacement Guide
2014-2018 Nissan Rogue Tail Light Bulbs Replacement Guide
The tail light housings of a 2nd generation (2014, 2015, 2016, 2017 and 2018) Nissan Rogue SUV contain the brake, rear turn signal, reverse and parking light bulbs. Check out my DIY tutorial for changing a burnt out bulb (with the compatible replacement part numbers) by clicking on the text link or thumbnail image below.
2014-2018 Nissan Rogue Cargo Area Light Bulb Replacement Guide
If you need to change a burnt out cargo area (or “trunk”) light bulb in your second generation 2014, 2015, 2016, 2017 and 2018 Nissan Rogue SUV, check out my DIY tutorial for the procedure (with the compatible replacement part number) by clicking on the text link or the thumbnail image below.
2014-2018 Nissan Rogue Cargo Area Light Bulb Replacement Guide
2014-2018 Nissan Rogue Plastic Interior Door Panel Removal & OEM Speaker Upgrade Guide
If you would like to upgrade the OEM door speakers in your second generation (2014, 2015, 2016, 2017 and 2018) Nissan Rogue SUV, you’ll first have to take off the plastic interior door panels. Check out my DIY instructions for the procedure (with the compatible replacement aftermarket speaker sizes) by clicking on the text link or thumbnail picture below.
2014-2018 Nissan Rogue Dome Light Bulb Replacement Guide
If you need to change a burnt out overhead dome light bulb in your 2nd generation (2014, 2015, 2016, 2017 & 2018) Nissan Rogue SUV, check out my DIY tutorial for the procedure (with the compatible replacement part numbers) by clicking on the text link or thumbnail image below.
2014-2018 Nissan Rogue Sun Visor Vanity Mirror Light Bulb Replacement Guide
If you need to change a burnt out vanity mirror light bulb in the sun visor of your 2nd generation (2014, 2015, 2016, 2017 & 2018) Nissan Rogue SUV, check out my DIY tutorial for the procedure (with the compatible replacement part numbers) by clicking on the text link or thumbnail image below.
2014-2018 Nissan Rogue Vanity Mirror Light Bulb Replacement Guide
2014-2018 Nissan Rogue A/C Cabin Air Filter Replacement Guide
If the air conditioning system in your 2nd generation 2014, 2015, 2016, 2017 and 2018 Nissan Rogue SUV hasn’t been working very well recently or the air coming out of the vents smells a bit musty or moldy, you probably need to clean or change the cabin air filter element in the HVAC blower motor housing. To view my DIY instructions for the procedure (with the compatible replacement part numbers), click on the text link or the thumbnail image below.


