
Ford Edge
Door Panel Speaker Replacement Guide
How to remove the front door panel &
replace the OEM (stock) 6"x8" speaker on a 2007 to 2010 Ford Edge CUV.

By Paul B. Michaels Author & Photographer Auto Mechanic Since 1989 |
||
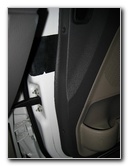
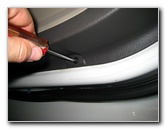
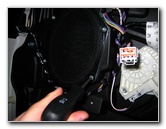
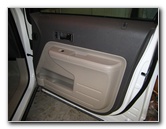 Edge Front Door Panel |
 Screws On Outer Side |
 Remove Philips Screws |
|
This
automotive "how-to" guide was specifically written to assist owners
of the first generation (2007, 2008, 2009, 2010 and possibly also
the updated 2011, 2012, 2013 & 2014) Ford Edge CUV in removing a front
or rear door panel and upgrading the 6"x8" speaker. Owners of other Ford, Lincoln or Mercury vehicles such as the Taurus, Fiesta, Fusion, Focus, Mustang, Flex, Ranger, F-150, Escape, Explorer, Expedition, MKZ, MKX, MKS, MKT, Navigator, Milan, Mariner, Mountaineer, Grand Marquis & Town Car may also find this guide to be helpful. Although the stock Ford factory speakers in the 2007-2010 Edge are more than adequate, some owners will want to upgrade them with better aftermarket speakers. The only tools needed to complete this procedure are a Phillips head screwdriver, a 7/32 socket with ratcheting wrench and a Torx T-15 screwdriver. |
||
|
|
||
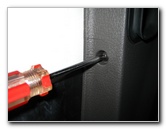
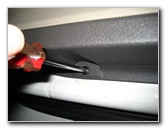
 Outer Side Screw # 2 |
 Two Inner Side Screws |
 |
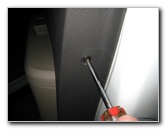
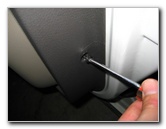
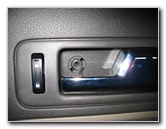
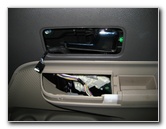
| To access the door
speaker in a 07-10 Ford Edge, you'll first need to remove the door panel.
This guide covers removing the front passenger door panel, but the procedure
should be very similar if not identical for the other doors.
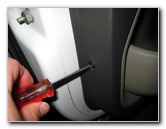
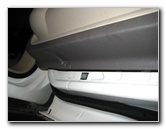
First use the Phillips head screwdriver to remove the two screws on the outer edge of the door, the two screws on the inner edge of the door, and the two screws on the bottom lip of the door panel. |
||
 |
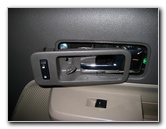
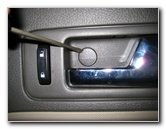 Door Handle Screw Cover |
 T-15 Torx Screw |
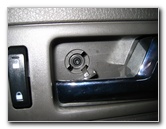
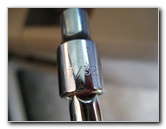
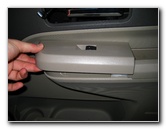
| Next, pop off the
round plastic screw cover that hides the Torx T-15 screw just above the
interior door handle.
Remove the screw with a size Torx T-15 screw driver. A small flathead screwdriver may also work if you don't have any Torx tools. |
||
 Remove Torx Screw |
 Screw Removed |
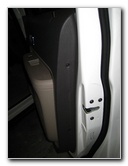
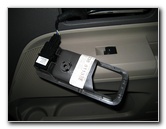
 Door Storage Container |
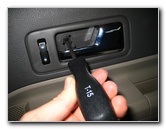
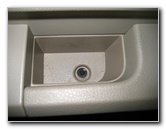
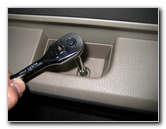
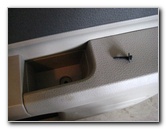
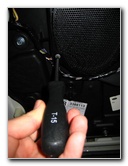
| The last fastener
that has to be removed is a small screw located in the storage cubby hole in
the door's armrest.
Use a size 7/32" socket on an extension piece to unscrew it. |
||
 7/32 Socket On Extension |
 Remove 7/32 Screw |
 7/32 Screw Removed |
 2 Screws Bottom Lip |
 |
 Removing Bottom Screws |
 Pop Out Door Handle Trim |
 Door Lock Connector |
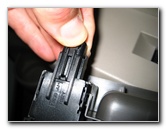 Remove Power Connector |
| Now that all of the screws have been removed, you can pop out the trim piece around the door handle and disconnect the power door lock switch's power connector. | ||
 Power Door Lock Detached |
 Pull Up Lower Edge |
 Plastic Retaining Rivets |
| Then pop off the front part of the arm rest that contains the power window switch and disconnect the power connector. | ||
 Pull Up Power Window Trim |
 PW Trim Removed |
 |
| Move to the lower edge of the door panel and pry it up with a flathead screwdriver or just pull on it with your hands. The white plastic snap rivets should be relatively easy to pull out. | ||
 |
 Pop Off PW Connector |
 Power Window Switch Off |
 |
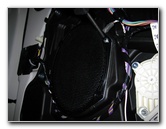
 Pull Panel Up & Off |
 Front Door Panel Removed |
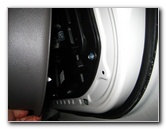
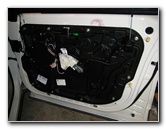
| Make sure that all of the plastic snap fasteners at the bottom are free and gently pull up on the door panel to remove it. Be careful to not bend the door lock stalk at the top of the door panel. | ||
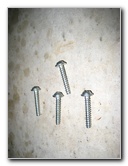
 Removing T-15 Screws |
 Four Torx T-15 Screws |
 Stock OEM 6"x8" Speaker |
| To remove the four screws holding the stock 6"x8" Ford Speaker in place, you'll need a Torx T-15 screwdriver. | ||
 |
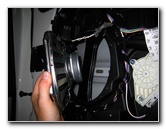 Pull Off 6x8 Speaker |
 Press Connector Clip |
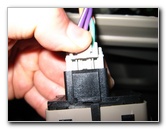
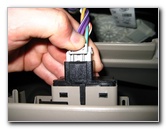
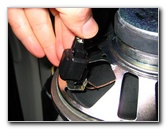
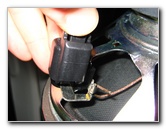
| Pull off the
speaker from the door panel and disconnect the power plug by pressing on the
black plastic tab.
Some replacement aftermarket speakers come with adapters so that you can avoid cutting the OEM wiring. If yours didn't you can also use wire taps to connect the wires for your new speakers without cutting the stock power plug. To reduce road noise and make your new speakers sound better, I recommend applying some Dynamat Sound Deadener to the metal door frame. It will help stop vibrations and rattles when you crank up the volume. |
||
 Remove Power Connector |
 |
 Door Speaker Removed |
| For more of my
related automotive how-to guides, click on the following links:
Ford Edge Headlight Bulbs
Replacement Guide,
Ford Edge Front Brake Pads Replacement Guide,
Ford Edge
Cabin Air Filter Guide,
Ford Edge
Engine Oil Change Guide,
Ford
Edge Rear Brake Pads Replacement Guide,
Ford Edge Tail Light Bulbs Replacement Guide,
Ford Edge Power Window Motor Replacement
Guide,
Ford Edge Key Fob Battery Replacement Guide,
Ford Edge Rear Wiper
Blade Replacement Guide,
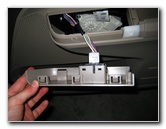
Ford Edge Overhead Map Light Bulbs Replacement
Guide,
Ford Edge Vanity Mirror Light Bulb Replacement Guide,
Ford Edge Rear
Dome Light Bulbs Replacement Guide,
Ford Edge Cargo Area Light Bulb
Replacement Guide,
Ford Edge
Fog Light Bulb Replacement Guide and
Ford Edge License Plate Light Bulbs Replacement
Guide. Check out all of my
2007-2010 Ford Edge DIY Repair & Maintenance Guides. |
||
| If you found this guide to be helpful,
please consider making a small donation by clicking on the PayPal.com
"Donate" button located to the right of this paragraph. Thank you!
(Note: I am not a registered charity. Donations are not tax deductible.) |