
Goodman HVAC
Condenser Coils Cleaning Guide
How to clean dust, dirt, hair & debris
out of the coils in a Goodman brand A/C condenser including pictures & steps.

By Paul B. Michaels Author & Photographer Auto Mechanic Since 1989 |
||
|
|
||
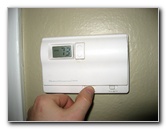
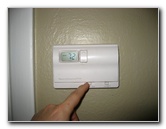 Turn Off A/C Thermostat |
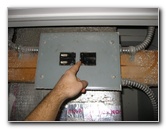 Turn Off Power Breakers |
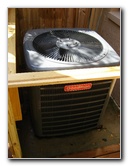
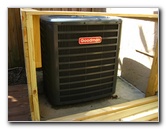 Goodman A/C Condenser |
| This home
maintenance guide was specifically written to assist owners of the
Goodman brand A/C condenser model # GSC130361FA in cleaning dust,
dirt, debris, or pet hair from the metal coils to ensure maximum
energy and cooling efficiency. Owners of other similar HVAC condenser units from various manufacturers such as Gibson, Rheem, Trane, GE (General Electric), Mars, Carrier, York, Lennox, Frigidaire, Kenmore, Mitsubishi, Maytag, and Whirlpool may also find this guide to be helpful. The only tools needed to complete this procedure include a flathead screwdriver, a wet/dry shop vacuum, coil cleaning spray, and a garden hose. Some suitable alternatives to commercial HVAC coil cleaning spray include any foaming degreaser, a multi-purpose cleaner such as ZEP or Simple Green, and household dishwashing soap mixed with warm water in a sprayer bottle. |
||
|
|
||
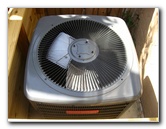 Condenser Fan Motor |
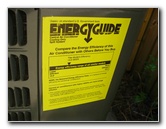 Energy Guide Rating |
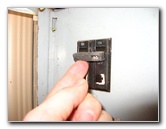
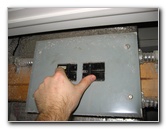
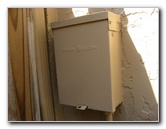 Condenser Breaker Box |
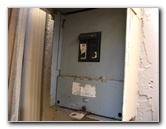
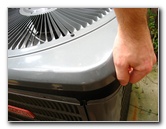
| The first few steps are to turn off the A/C system at the thermostat, turn off the power supply to the HVAC system at the breaker box inside the house and turn off the breaker switch for the condenser outside the home. | ||
 Dual Breaker Switch |
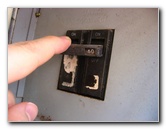 Turn Power Off |
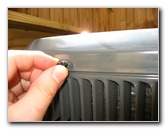
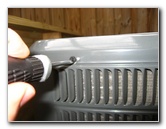 Remove Flathead Screws |
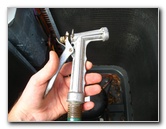
| Then gather up a flathead screwdriver (your condenser may have Phillips head, Torx, or hex head screws instead), a wet/dry shop vacuum for removing debris from the bottom of the unit, the coil cleaning spray of your choice, and a garden hose with a spray nozzle attached. | ||
 |
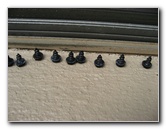 10 Screws Removed |
 Lift Up Top Cover |
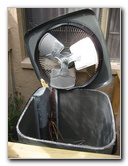
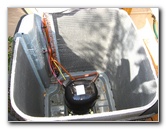
| There were 10 short
flathead screws holding the top cover and fan motor in place on this Goodman
condenser unit.
Once all the screws were removed, I gently lifted up the top of the case. I used a scrap piece of wood to partially support the top cover and rested the fan housing on the coils. Be sure to not stress the wires that connect the fan motor to the rest of the condenser. It would have been best to have someone hold the fan motor while you clean the coils, but this procedure can be done by just one person. |
||
 Cover & Fan Removed |
 Rest Fan On Side |
 Vacuum Out Debris |
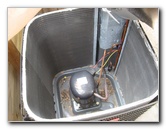
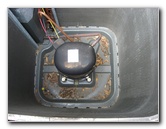
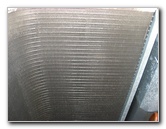
| Next, use the
wet/dry shop vacuum to remove all of the leaves, twigs, and debris that has
settled on the bottom of the condenser unit.
Don't be tempted to use the wet/dry vacuum on the condenser coils because the powerful suction will cause the hose attachment to bend and damage the fragile aluminum fins. Although you could swap the hose to the other connection on the wet/dry shop vac and gently blow out the coils first before getting them wet in the next steps. Just don't hold the hose too close to the fins since they could be bent that way as well. |
||
|
|
||
 Do Not Stress Wires |
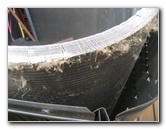 Pet Hair & Dust |
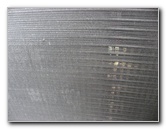 Condenser Coils |
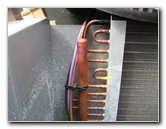
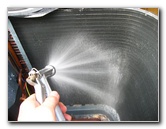
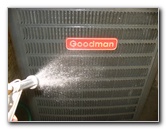
| Thoroughly spray
down the coils inside the condenser with a cleaner such as
HVAC coil cleaning spray. I just happened to have a bottle of Zep All Purpose Cleaner & Degreaser handy for the job. I also saturated the outside of the condenser unit's case with the cleaning spray to help dislodge any debris stuck to the outer side of the coils or the ventilated metal case. |
||
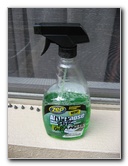 Zep All Purpose Cleaner |
 Spray Cleaner On Coils |
 Saturate Outside With Zep |
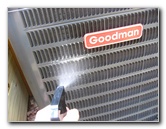
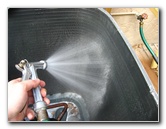
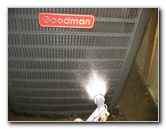
| I let the Zep
cleaner sit for a few minutes before flushing the coils inside the condenser
with the garden hose nozzle.
If you have an adjustable spray head, set it for the "shower" or any other relatively gently setting that won't bend the aluminum fins. It's best to spray from the top to the bottom of the coils and repeat the process several times all around the inside of the condenser to ensure that as much dust, dirt, debris, and hair is removed from the coils. |
||
 Garden Hose |
 Thoroughly Spray Coils |
 Rinse From Top To Bottom |
| If your condenser's coils are severely clogged, you may want to consider taking the time to remove the entire metal case that surrounds the condenser to get better access to the outer side of the coils. | ||
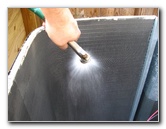 |
 Water Spraying Through |
 Cleaned Condenser Coils |
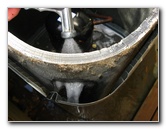
| The coils in this condenser weren't all that dirty, so I just flushed the outside of the case with the hose and sprayed water down into the small gap between the coils and the metal case. | ||
 Rinse Outside of Condenser |
 |
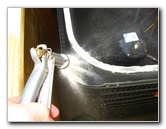 Rinse Between Case & Coils |
| Once you're
satisfied that the coils are spotlessly clean, you can gently lower the fan
motor and top of the case back down onto the condenser unit.
Try to avoid putting stress on the power wires or pinching them between the top cover and the rest of the case. |
||
 Clean & Efficient Coils |
 Lower Fan & Top Cover |
 Replace Screws |
| Check that all 10
of the screw holes in the top cover line up with the corresponding hole in
the outer case.
Then insert the screws and tighten them with the screwdriver. |
||
 Tighten Screws |
 |
 |
| To finish the job,
flip the outdoor breaker switch by the condenser to on, turn on the switches
for the HVAC system inside the home's breaker box, and turn on the A/C
system at the thermostat.
You should shortly afterwards hear the fan motor start spinning and the air handler should begin blowing out cool air. |
||
 Turn On Outside Breaker |
 Turn On Inside Breakers |
 Turn On Thermostat |
| For more of my home
repair and maintenance guides, please click on the following links:
Goodman Condenser Capacitor Replacement Guide,
Rheem A/C Capacitor Replacement Guide,
Rheem HVAC Condenser Coils Cleaning Guide,
Refrigerator Freezer Icemaker Replacement Guide,
Bathtub Shower Diverter Valve Replacement Guide,
Home Water Heater Sediment Flushing Guide,
Rheem HVAC Air Handle Coils Cleaning Guide,
A/C Condensate Water Drain Pipe Flushing Guide,
Home Clothes Dryer Lint Vent Cleaning Guide,
Laptop HDMI To HDTV Over CAT6 Connection Guide,
Culligan US-600A Under Sink Water Filter Installation Guide,
Culligan IC-EZ-1 Drinking Water Filter Installation Guide,
Culligan IC-100 Icemaker Water Filter Installation Guide,
Kitchen Sink Drain Leak Repair Guide,
Hunter Just Right Digital Thermostat Installation Guide,
Sticky Door Lock Lubrication Guide,
Honda EU3000is Generator Maintenance Guide,
Kenmore Oven/Range 220V Power Restoration Guide,
Toilet Water Supply Valve Leak Repair Guide,
Refrigerator Water Leak Repair Guide,
GE HVAC Condenser Dual Run Capacitor Replacement Guide,
Delta 75520 Massaging Shower Head Installation Guide, and the
Carpenter Bee Insect Pest Control Guide. Please check out my full list of DIY Home Repair & Maintenance Guides. |
||
| If you found this guide to be helpful,
please consider making a small donation by clicking on the PayPal.com
"Donate" button located to the right of this paragraph. Thank you!
(Note: I am not a registered charity. Donations are not tax deductible.) |