
Hyundai
Accent Tail Light Bulbs Replacement Guide
A pictures illustrated guide for
replacing the tail light bulbs (reverse, signal, parking, brake) on a Hyundai
Accent.

 |
 |
 |
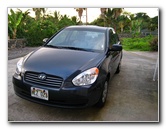
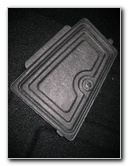
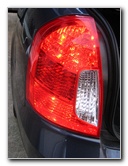
| This guide was
specifically written to assist owners of the 2010 Hyundai Accent GLS
four door compact sedan in replacing the tail light bulbs. The rear lamp assembly contains the following 4 light bulbs: reverse, parking, signal, and brake. The replacement bulbs have the following part numbers from manufacturers such as Sylvania: Rear Turn Signal # 1156, Tail (Parking) Light # 2357, Stop (Brake) Light # 2357, Back Up (Reverse) Light Bulb # 921. Please proceed with caution at your own risk! The first step to replace any of the tail light bulbs in the rear lamp assembly is to pop the trunk and unscrew the felt/cardboard access door. |
||
|
|
||
 |
 |
 |
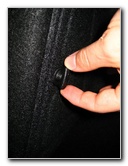
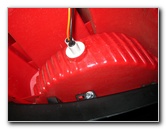
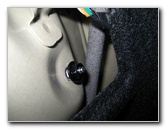
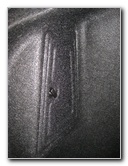
| The felt or carpeted access door can be removed by unscrewing the one thumb screw counter clockwise until the door pops off from the rest of the trunk's carpeting. | ||
 |
 |
 |
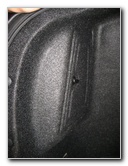
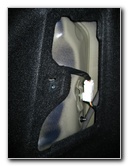
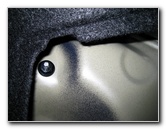
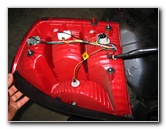
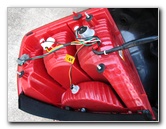
| Behind the tail
light access door, you'll find three nuts holding the tail light assembly in
place.
I believe that the nuts are 8 mm in size. All I had available was my Leatherman multi-tool. Remove the three nuts by turning them counter clockwise. |
||
 |
 |
 |
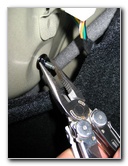
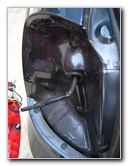
| After the three
nuts are removed, you can gently wiggle the tail light assembly until it
separates from the metal body of the car.
If you have trouble, try gently tapping on the heads of the three screws inside the trunk while also pulling on the tail light housing. |
||
 |
 |
 |
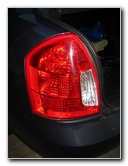
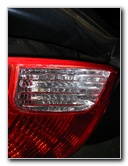
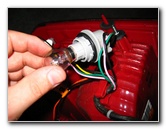
| Once the tail light
housing is free from the rest of the car, gently lower it until it rests on
the car and is supported by the wire harness.
All of the four bulbs (reverse, brake, parking, and signal) can be accessed by turning the bulbs counter clockwise a quarter turn. The three larger bulbs (brake, parking, signal) are removed from their power connectors by pushing down and turning counter clockwise a quarter turn. To remove the reverse light bulb, just wiggle it straight out of its socket. |
||
 |
 |
 |
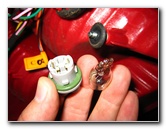
| Once again, the
part numbers for the four bulbs are Brake/Stop Light #
2357, Tail/Parking
Light # 2357, Turn Signal #
1156, and Reverse/Back Up Light #
921.
To finish the job, just insert the new bulb and reverse the above steps to re-attach the tail light assembly. Be sure to not over tighten the three nuts that secure the assembly as you may risk cracking it. Turn the three nuts about a 1/4 to 1/2 turn past finger tight. |
||
 |
 |
 |
| For more of my
related automotive updates, click on the following links:
Hyundai Accent
Headlight Bulb Replacement Guide,
Hyundai Accent Cabin Air Filter Replacement Guide,
Zaino Show Car Polish Review,
WeatherTech FloorLiner Review,
Headlight & Tail Light Condensation Solution Guide,
Corroded Car Battery Terminal Replacement Guide,
Garmin Nuvi 260W GPS Review,
Car Interior Carper Replacement Guide,
Faded Headlights Buffing Guide, and
K&N Air Filter Cleaning Guide. |
||
| If you found this guide to be helpful,
please consider making a small donation by clicking on the PayPal.com
"Donate" button located to the right of this paragraph. Thank you!
(Note: I am not a registered charity. Donations are not tax deductible.) |